Quick Start Guide
Create professional labels in a few easy steps. Follow this guide to master the editor.
Quick Start Guide
Create professional labels in a few easy steps. Follow this guide to master the editor.
Step 1: Select a Template
Start by choosing a template from the gallery. We offer various styles for Retail, Logistics, and more. You can also start from scratch.

[!TIP]
- Use the filters to find specific categories.
- Click Customize to load the template into the editor.
Step 2: Manage Data
Click Edit Data to open the Data Manager. You can add items manually or import from Excel/CSV files.
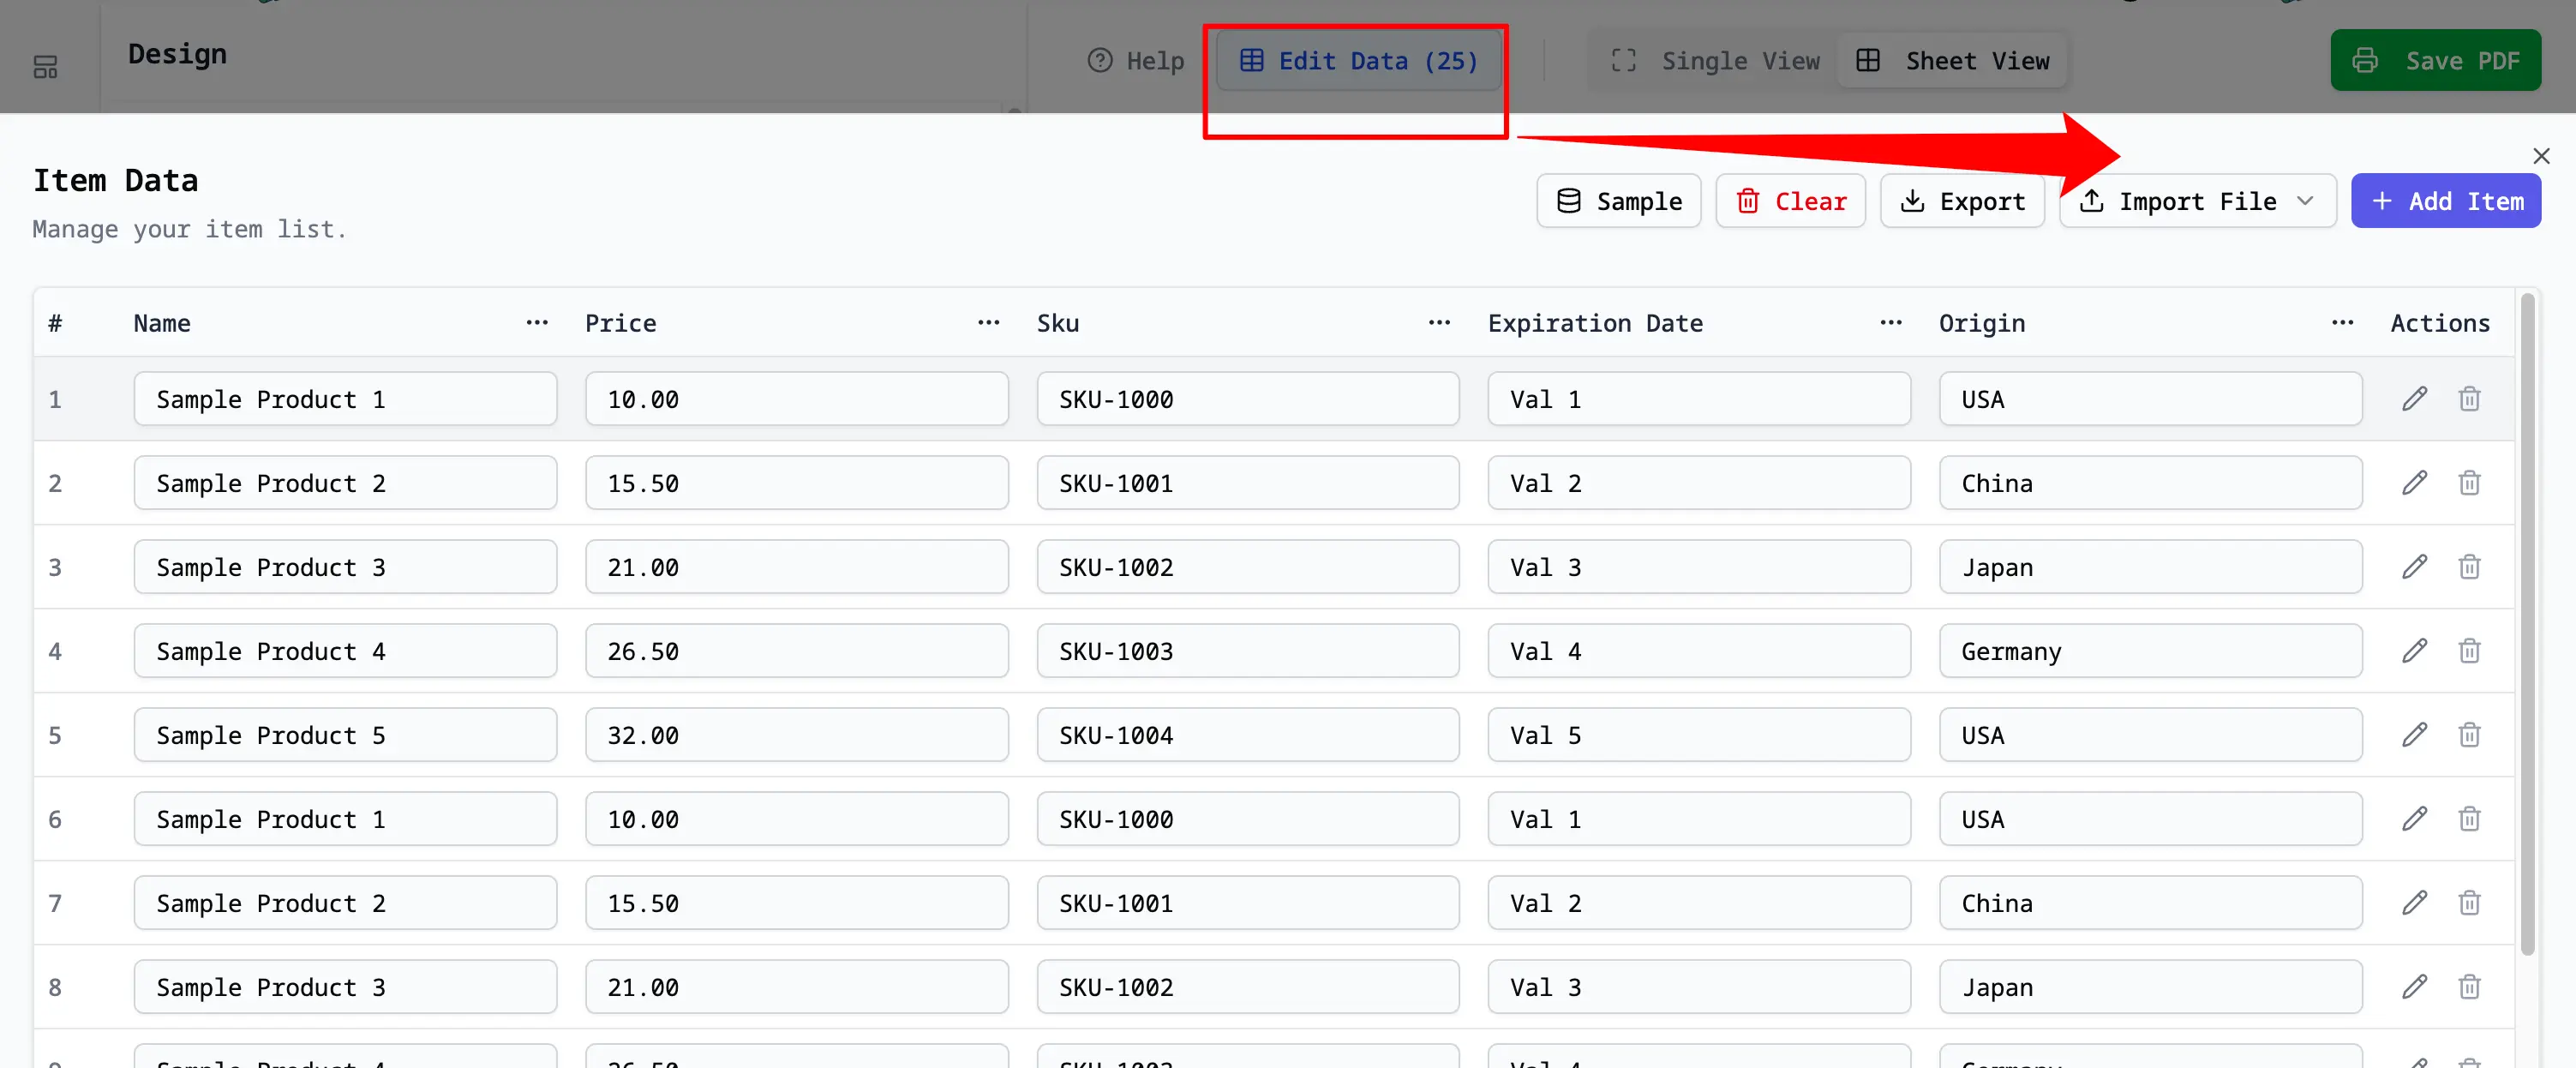
[!TIP]
- Importing data lets you batch print multiple labels at once.
- Ensure your file has headers for automatic mapping.
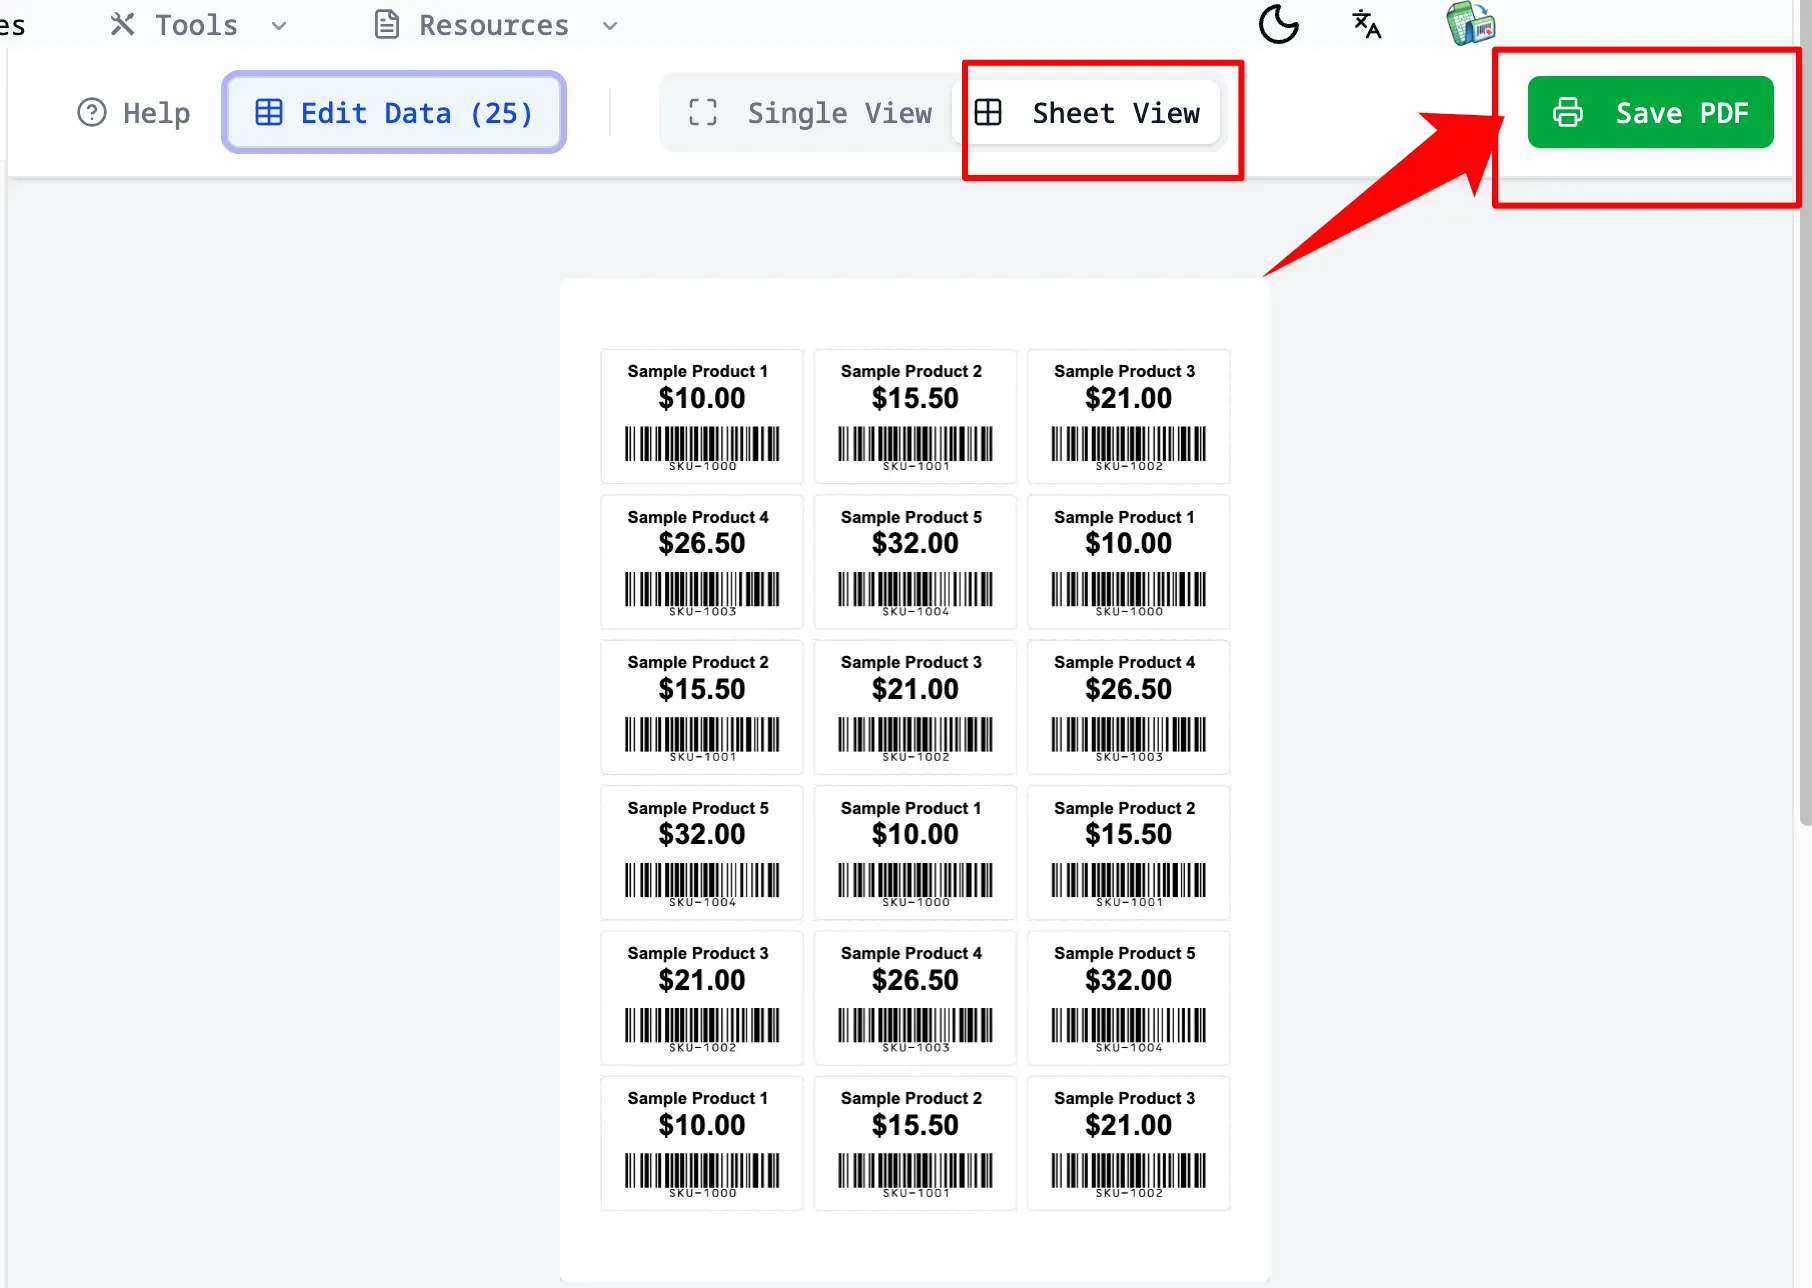
Step 3: Editor Views
Switch between views using the toolbar buttons:
- Single View: For designing the layout and editing elements.
- Sheet View: For previewing the full page layout before printing.
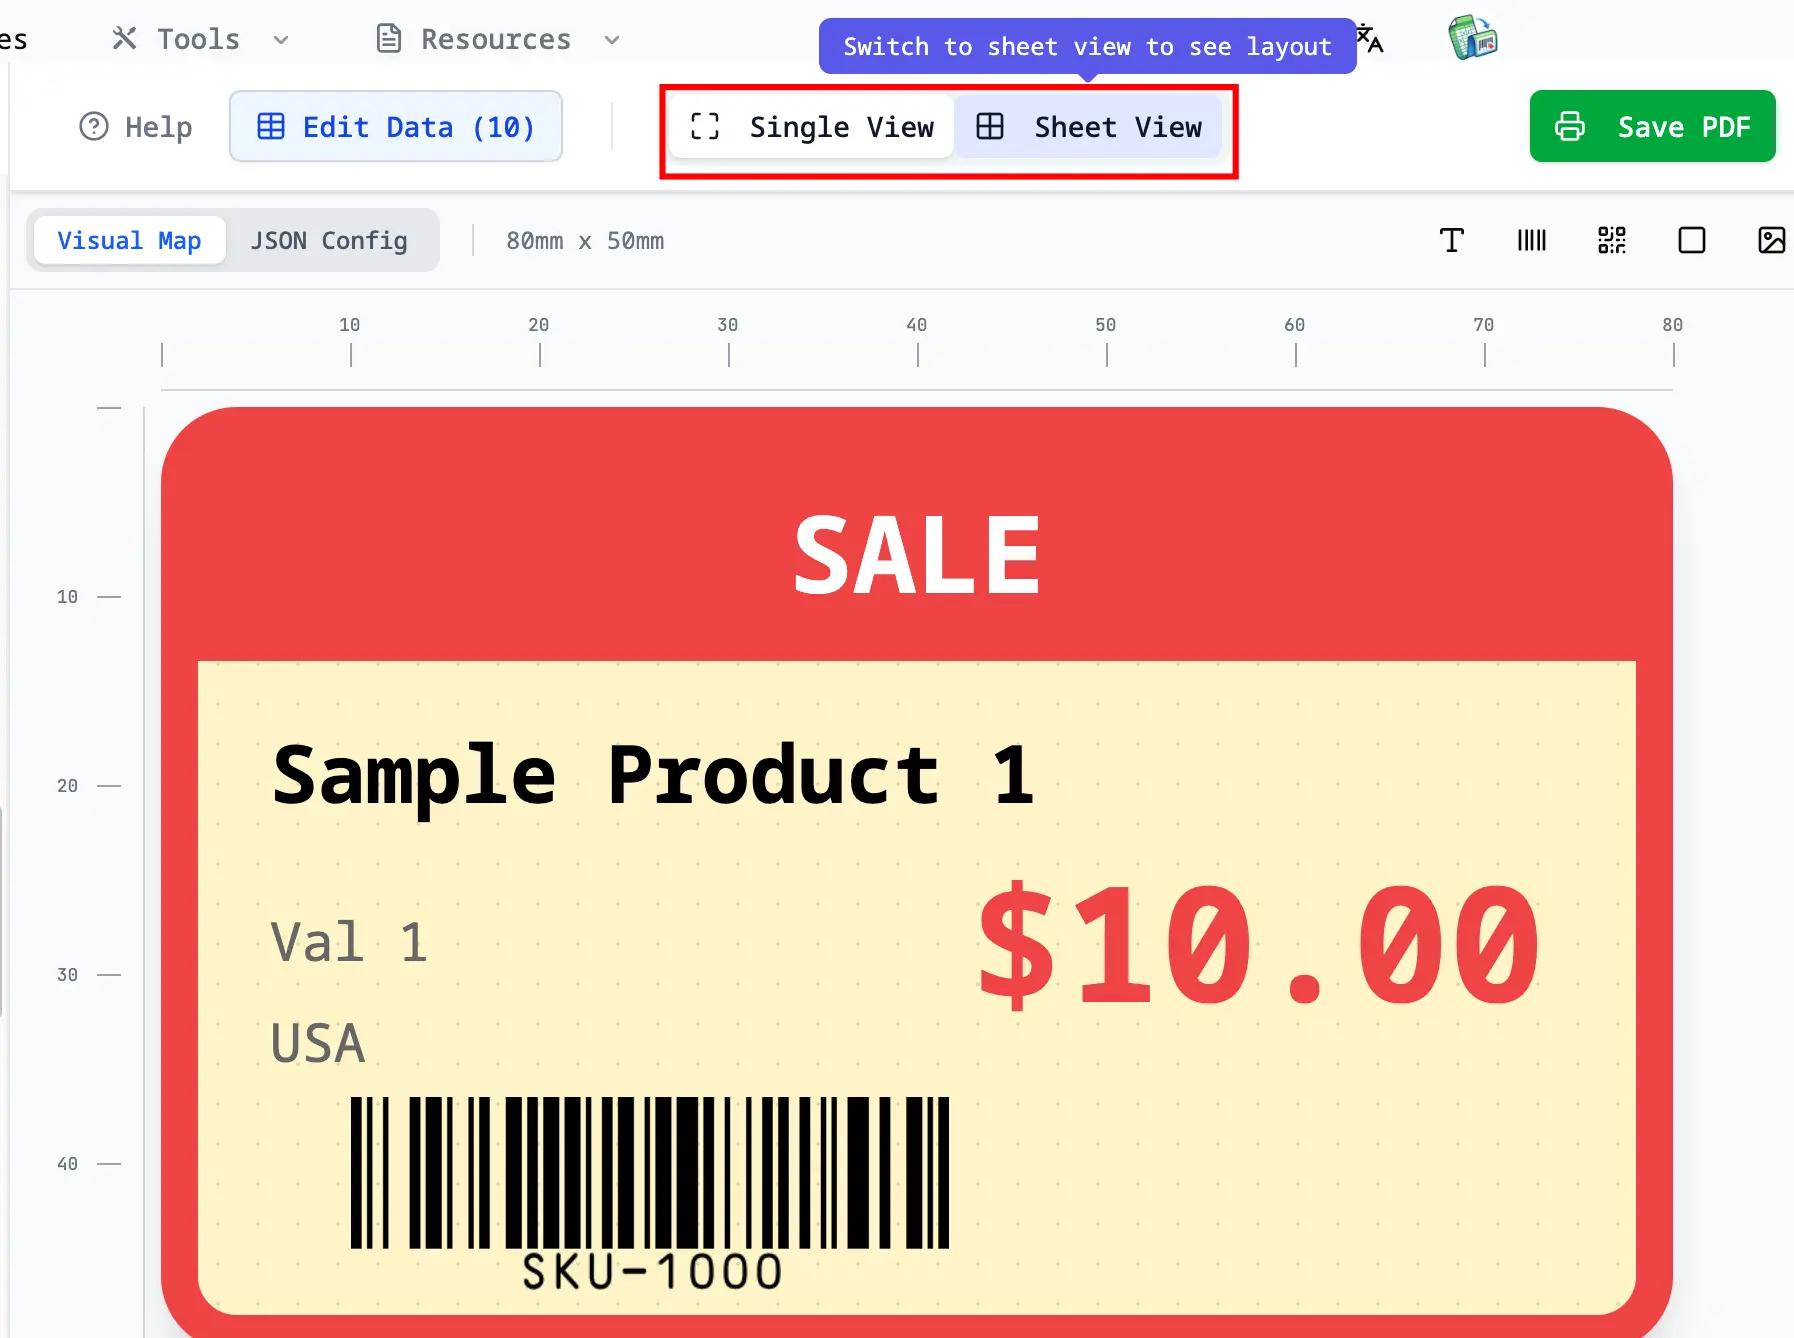
[!TIP]
- Use Single View to make design changes.
- Use Sheet View to check page margins and alignment.
Step 4: Design & Elements
In Single View, use the sidebar to add elements like Text, Barcodes, QR Codes, or Images.
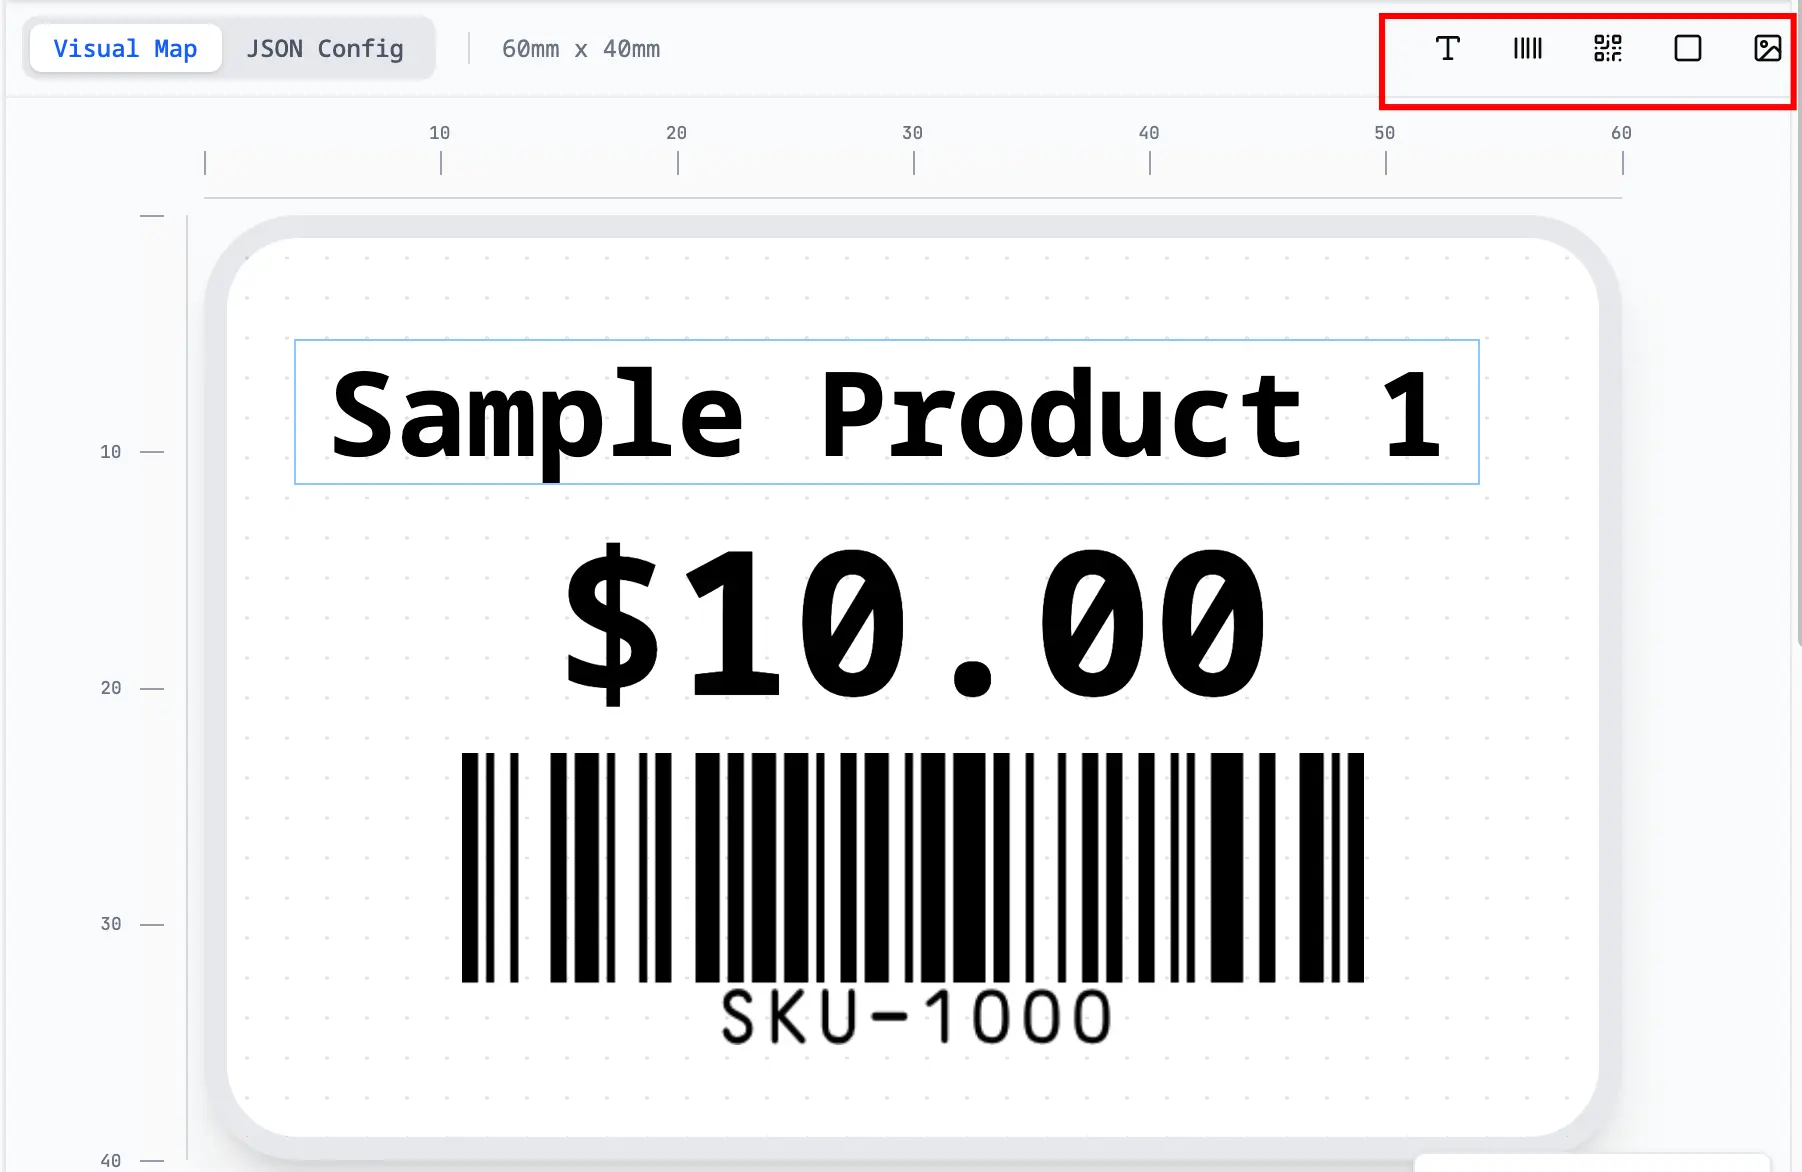
[!TIP]
- Drag elements to position them.
- Click an element to reveal styling options like Font Size and Alignment in the sidebar.
Step 5: Dynamic Data Binding
Connect elements to your data. Select an element and check Data Binding in the sidebar properties.
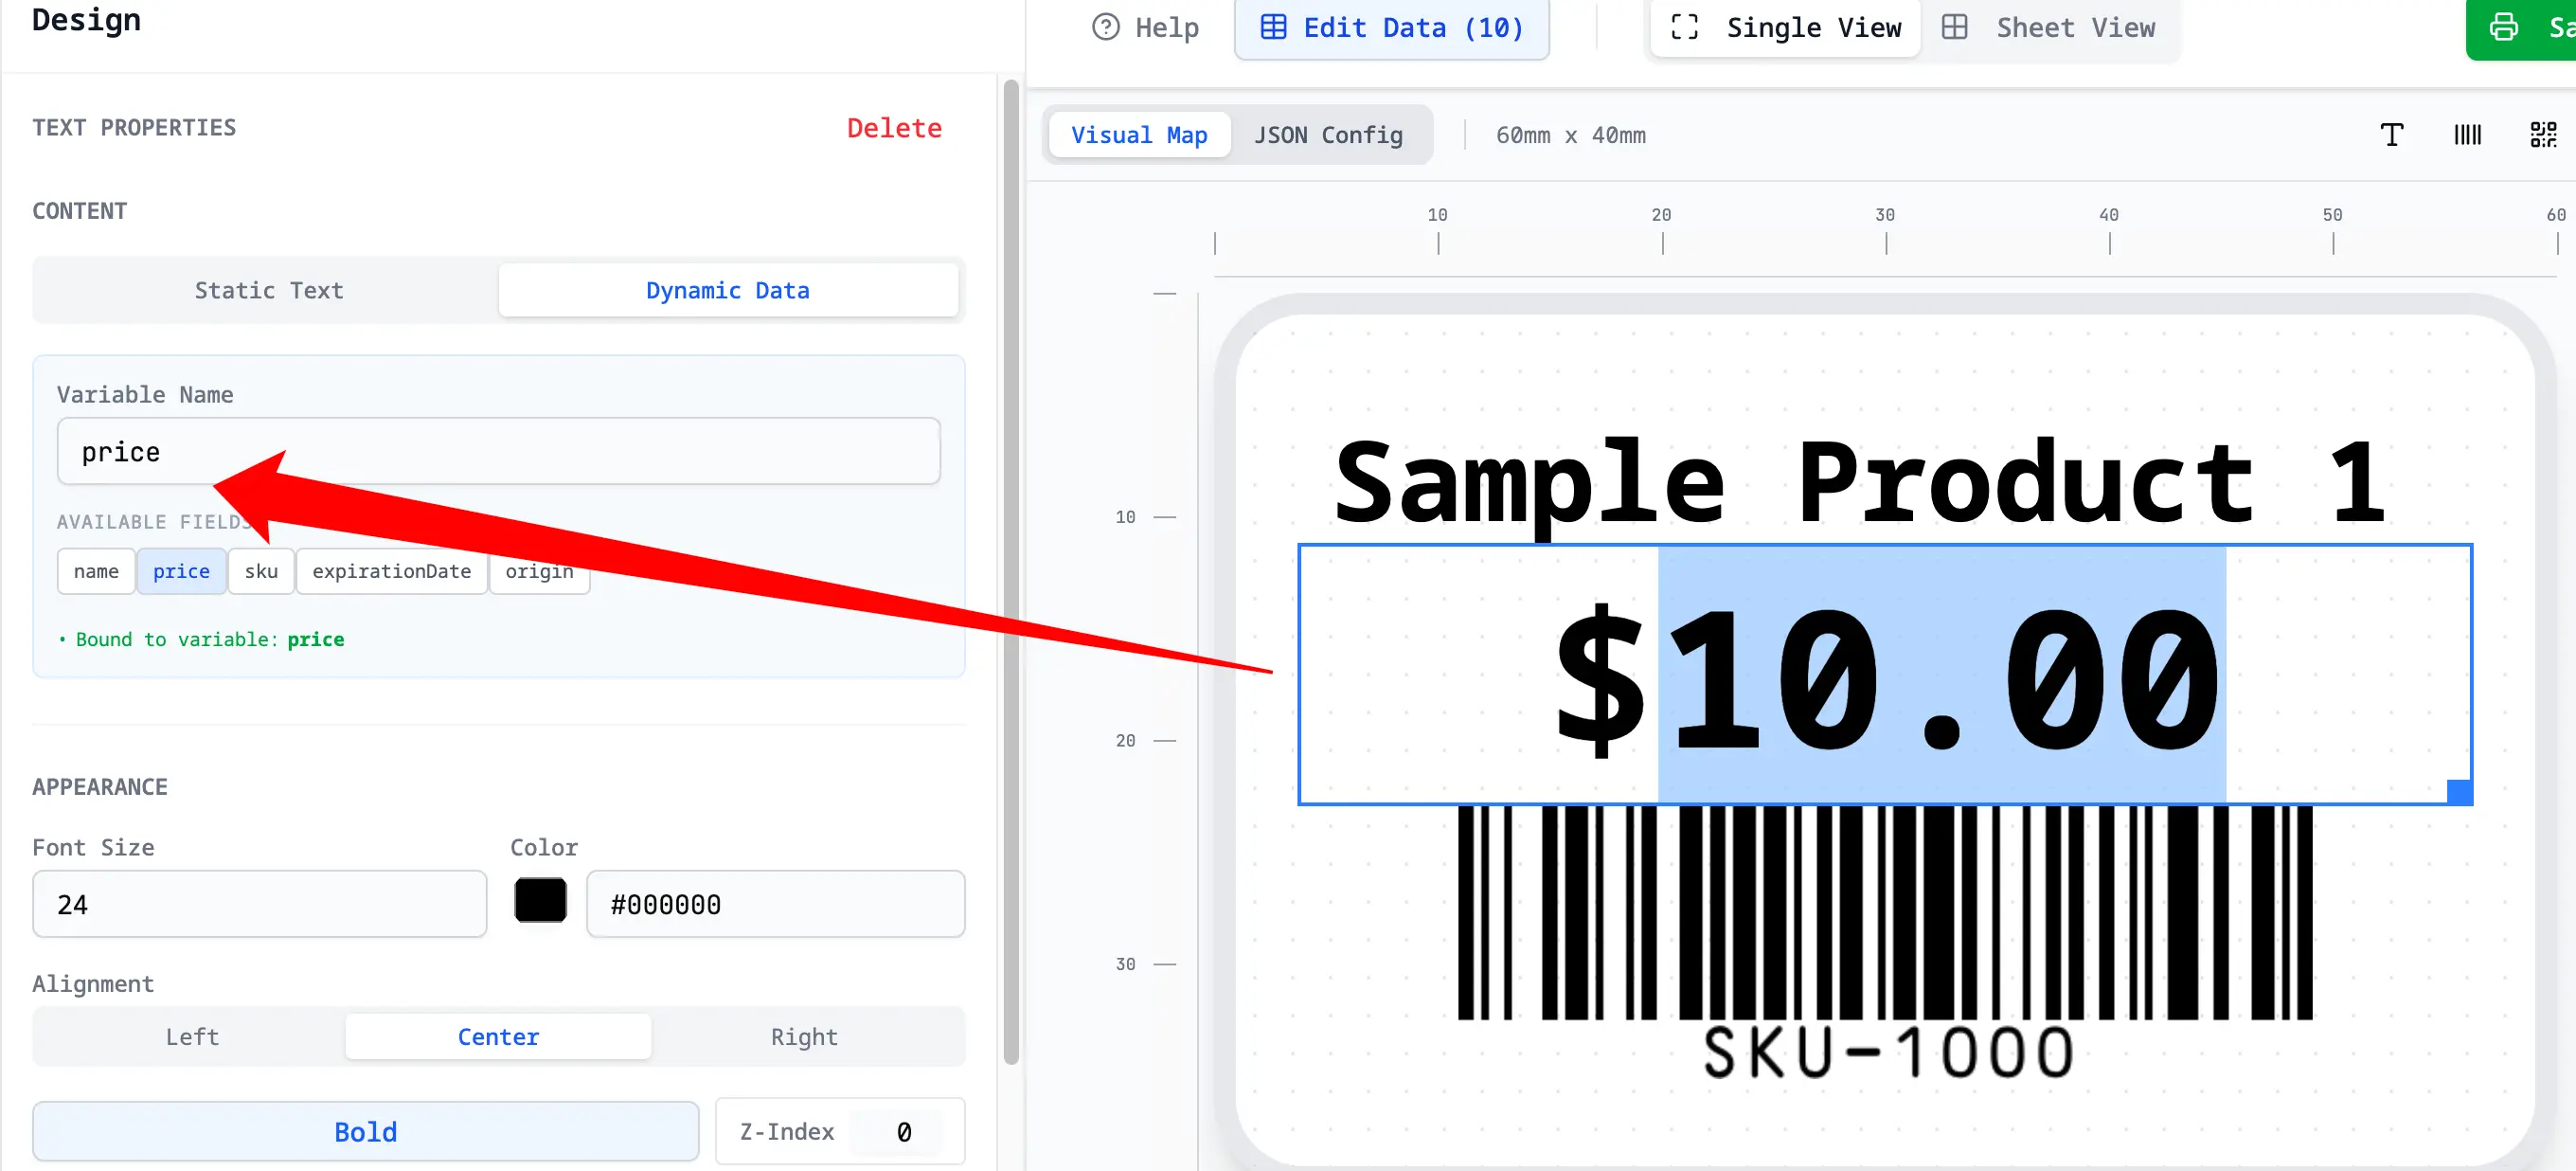
[!TIP]
- Select a field (e.g., "Price") to display unique data for each label.
- Uncheck Data Binding to use static text (same on all labels).
Step 6: Export & Print
Once satisfied, click Print PDF to generate a high-quality PDF ready for your printer.
[!TIP]
- Always verify the paper size (A4/Letter) in settings.
- Set Scale to 100% in your printer dialog for accurate sizing.