Images
Working with static and dynamic images in your labels
Add visual appeal to your labels with logos, photos, and graphics. Learn how to work with both static and dynamic images.
Adding Images
Static Images
Static images are the same on every label (e.g., company logo).
- Switch to Design Label mode
- Open the Design sidebar tab
- Click Image and select your image file
- Resize and position as needed
Supported Formats:
- PNG: Best for logos with transparency
- JPG: Best for photos
- SVG: Best for vector graphics (scalable without quality loss)
- GIF: Supported but not recommended for print
Dynamic Images
Dynamic images change based on your data (e.g., employee photos, product images).
- Add an Image URL column to your spreadsheet
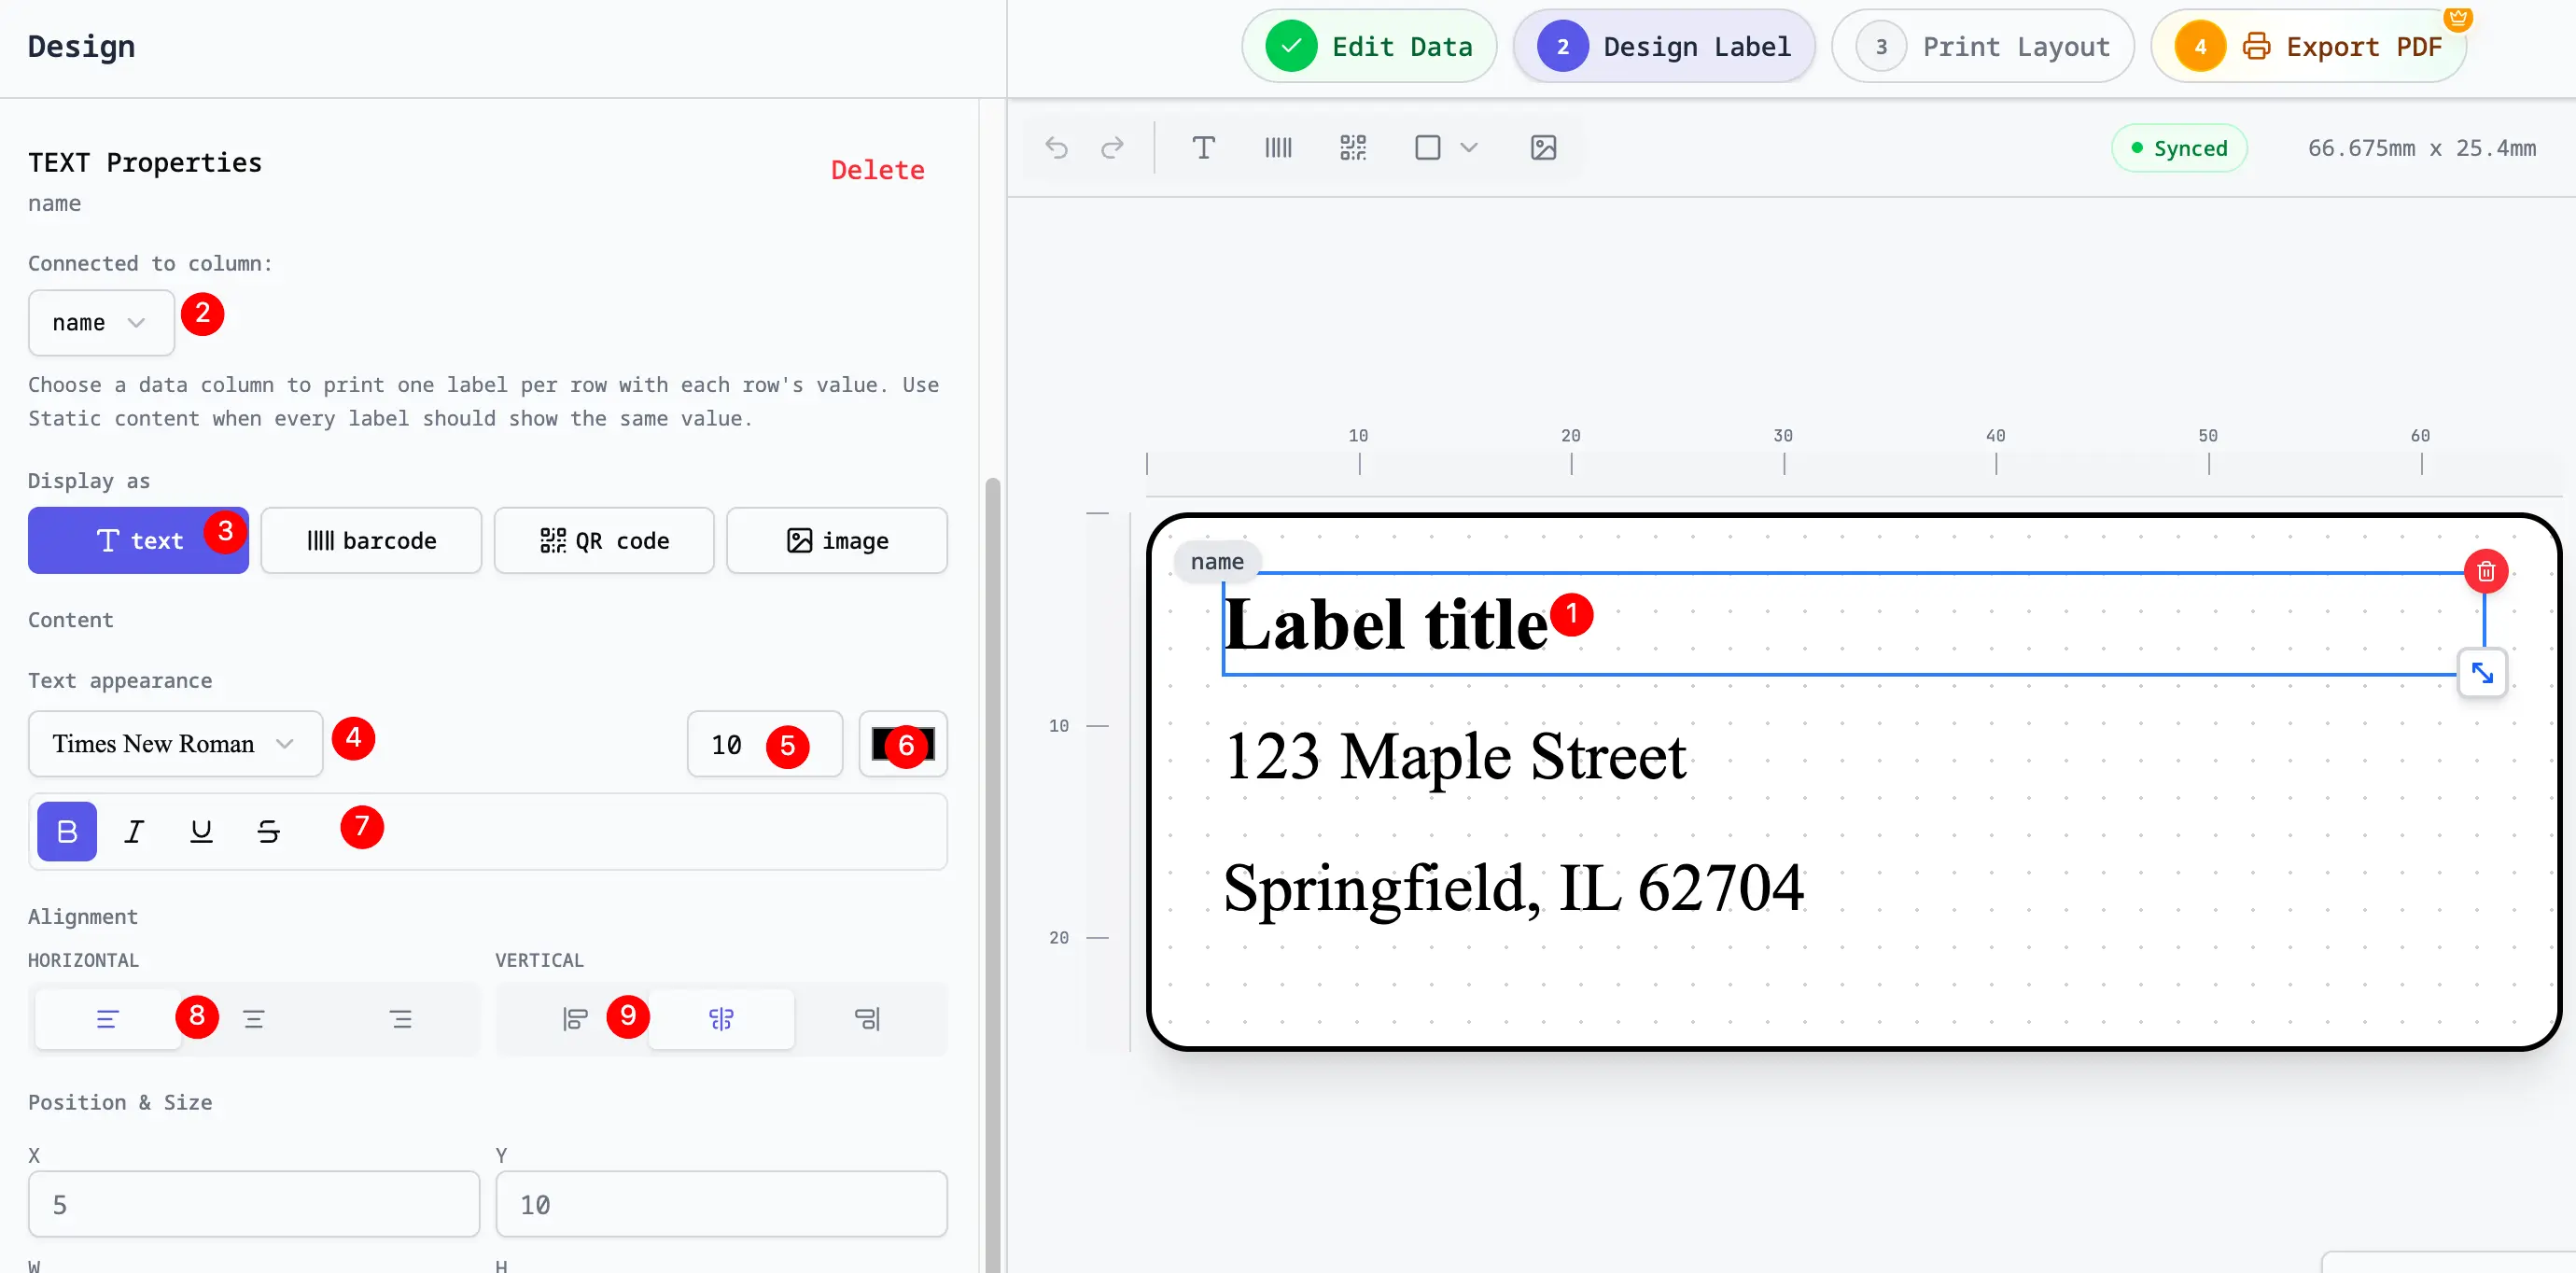
- Add an image element to your canvas from the Design tab
- Select the image element and choose Data Column
- Select your image URL column
- Preview to verify images load correctly
Example Data:
Name,Photo URL
John Smith,https://example.com/photos/john.jpg
Jane Doe,https://example.com/photos/jane.jpg
Local Image Bulk Matching (Privacy-First)
For users who want to keep their data private or avoid hosting images online, we support Local Image Bulk Matching. This allows you to link images directly from your computer without uploading them to any server.
How to use Batch Linking:
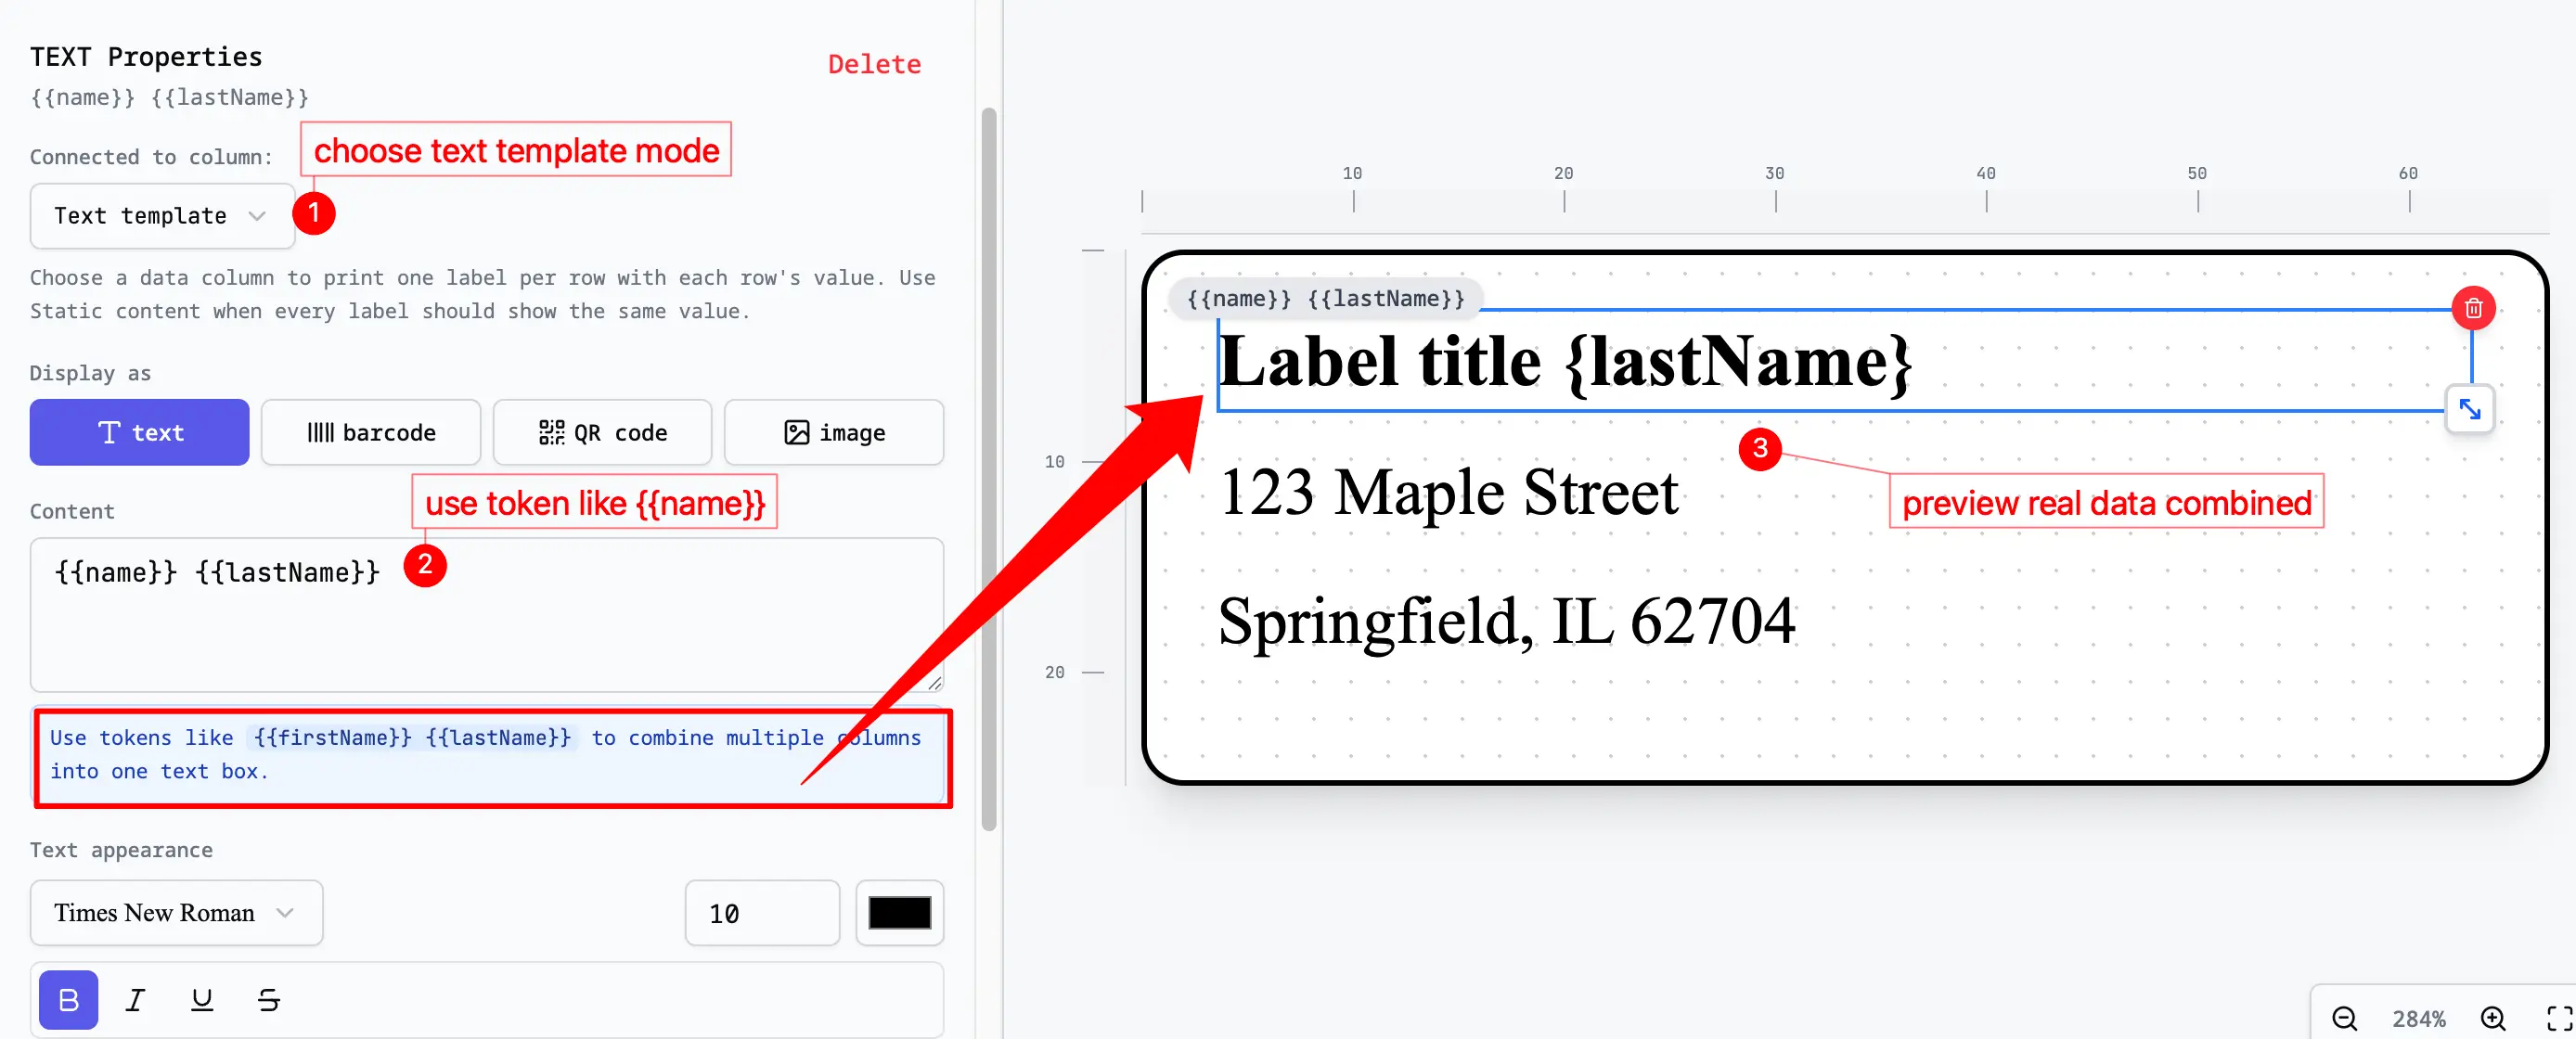
- Prepare your data: Ensure one of your columns (e.g., "Image", "SKU", or "ID") contains values that match your image filenames (e.g., if your file is
A001.png, your cell value should beA001orA001.png). - Open Data Manager: Click Edit Data in the editor toolbar.
- Batch Link: In the data table, find the column intended for images. Click the Batch Link Images (image icon) located in the column header.
- Select Files: Choose all relevant image files from your computer.
- Verify: Linked images will immediately show a thumbnail preview to the right of the data input field.
Important Notes:
- Privacy: Images are processed locally in your browser's memory. They are never uploaded to our servers.
- Browser Limitation: Due to security restrictions, these memory-based links (Blobs) are temporary. If you refresh the page or close the tab, the connections will be lost, and you will need to click "Batch Link Images" again to restore them.
- Matching Logic: The system intelligently matches filenames against all columns. It supports both exact matches (e.g.,
1.png) and name-only matches (e.g.,1).
Image Properties
Size and Position
- Width/Height: Set dimensions in pixels or inches
- Lock Aspect Ratio: Maintain proportions when resizing
- Position: X and Y coordinates from top-left corner
Fit and Alignment
- Contain: Fit entire image within bounds (may show empty space)
- Cover: Fill entire area (may crop image)
- Fill: Stretch to fill (may distort)
- None: Use original size
Opacity and Effects
- Opacity: 0-100% transparency
- Grayscale: Convert to black and white
- Blur: Add blur effect (use sparingly)
Image Quality
Resolution Guidelines
- Minimum: 150 DPI for acceptable quality
- Recommended: 300 DPI for professional printing
- High-end: 600 DPI for premium results
File Size
- Keep images under 5MB each for faster loading
- Optimize images before uploading
- Use appropriate format (PNG for logos, JPG for photos)
Calculating DPI
DPI = (Image Width in Pixels) / (Print Width in Inches)

Example:
1200px wide image printed at 4 inches = 300 DPI ✓
600px wide image printed at 4 inches = 150 DPI (acceptable)
300px wide image printed at 4 inches = 75 DPI ✗ (too low)
Common Use Cases
Company Logo
- Use PNG with transparent background
- Place in corner or header
- Keep size consistent across all labels
- Use SVG for best quality at any size
Product Photos
- Use high-resolution JPG
- Bind to image URL column for dynamic loading
- Ensure consistent aspect ratio across products
- Consider using placeholder for missing images
QR Code Overlays
- Add logo to center of QR code
- Keep logo small (max 30% of QR area)
- Use high error correction level
- Test scanning after adding logo
Background Images
- Use low opacity (10-30%) to avoid overwhelming text
- Ensure text remains readable
- Consider grayscale for subtle effect
- Use high-resolution images to avoid pixelation
Image Optimization Tips
Before Uploading
- Crop: Remove unnecessary parts
- Resize: Match your label dimensions
- Compress: Use tools like TinyPNG or ImageOptim
- Format: Choose appropriate format
Tools
- Online: TinyPNG, Squoosh, Compressor.io
- Desktop: Photoshop, GIMP, ImageOptim
- Batch: ImageMagick, XnConvert
Troubleshooting
Image Looks Blurry
- Cause: Low resolution or over-scaling
- Solution: Use higher resolution source image (300 DPI minimum)
Image Not Loading
- Cause: Invalid URL or CORS restrictions
- Solution: Ensure URL is publicly accessible, use HTTPS
Image Appears Distorted
- Cause: Aspect ratio not locked
- Solution: Enable "Lock Aspect Ratio" in properties
Colors Look Different When Printed
- Cause: RGB vs CMYK color space
- Solution: Convert to CMYK before uploading for accurate colors
File Upload Fails
- Cause: File too large or unsupported format
- Solution: Compress image or convert to supported format
Missing Images
When images are missing from your data:
- Default Image: Set a fallback image in properties
- Conditional Display: Hide image element if URL is empty
- Placeholder Text: Show "No Image" text instead
Best Practices
✅ Do:
- Use high-resolution images (300 DPI)
- Optimize file sizes before uploading
- Use PNG for logos with transparency
- Test print to verify quality
- Keep aspect ratios consistent
❌ Don't:
- Use low-resolution images from web
- Upload unnecessarily large files
- Stretch images (distorts quality)
- Use too many images (clutters design)
- Forget to test dynamic image URLs
Advanced Features
Image Filters
- Brightness: Adjust light/dark
- Contrast: Enhance differences
- Saturation: Adjust color intensity
- Hue: Shift colors
Masks and Shapes
- Crop images to circles or custom shapes
- Apply rounded corners
- Create photo frames
Layering
- Send images to back for backgrounds
- Bring to front for overlays
- Adjust z-index for complex layouts
Next Steps
- Barcodes & QR - Add scannable codes
- Layout Tools - Align images precisely
- Data Import - Learn about image URL columns
Use the DPI formula above to check whether an image is large enough before you print. For example, a 1200px-wide logo printed at 4 inches is 300 DPI.