
SheetsToLabels Interface Guide — Toolbar, Sidebar & Canvas Explained
A visual tour of the SheetsToLabels Label Designer. Learn what the workflow toolbar, sidebar tabs, canvas, and print preview each do before you start designing your first label.
Before diving into your first label, take 2 minutes to understand the layout. The public workspace is Label Designer, and the same visual editor powers related label, price tag, barcode, QR, and sheet-layout tools.
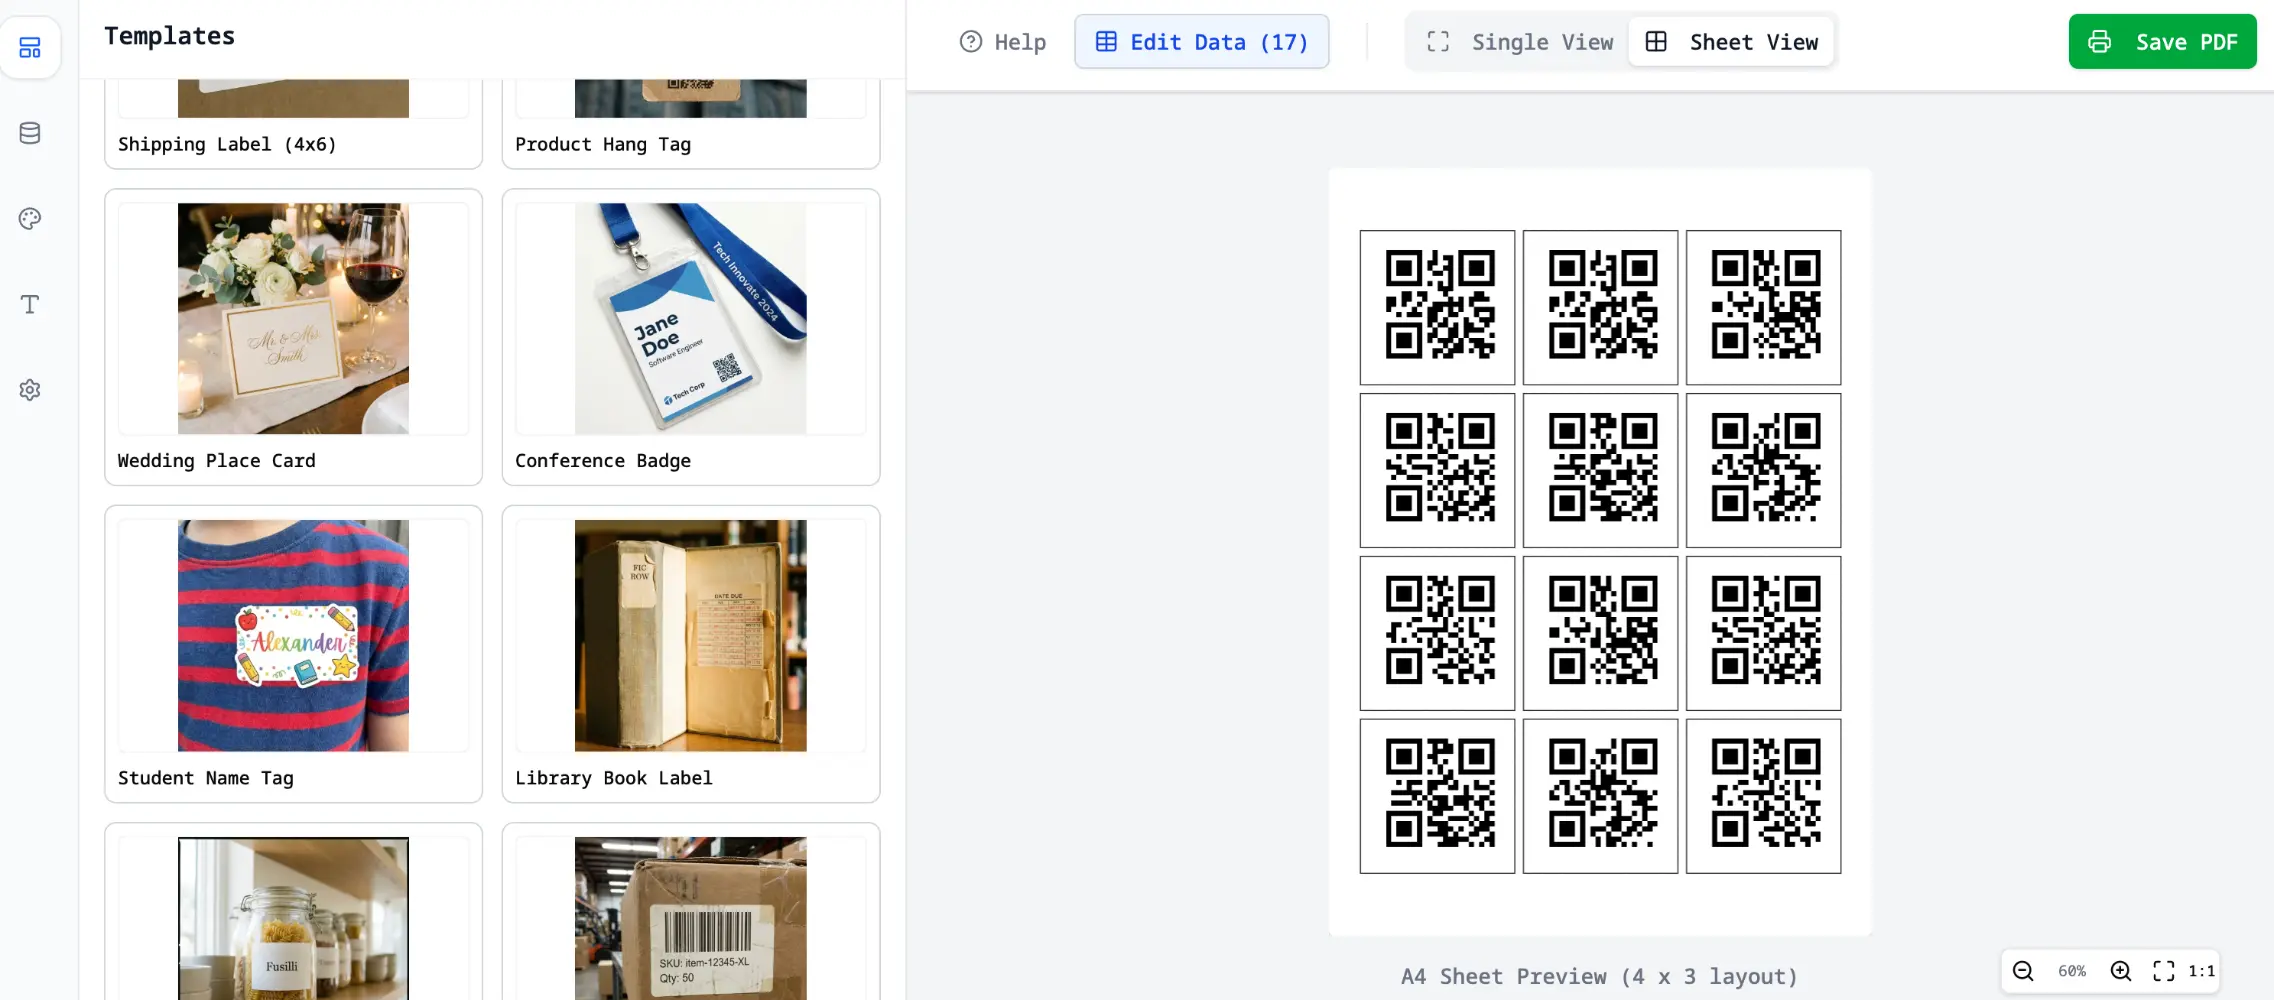
1. Workflow Toolbar
The toolbar keeps the main job in order: data first, design second, print layout third, export last.
| Button | What it does |
|---|---|
| Edit Data | Import or manage Excel, CSV, XML, Google Sheets, or pasted rows |
| Templates | Choose a ready-made layout or saved design when available |
| Design Label | Edit one label at a time on the canvas |
| Print Layout | Preview the full sheet, roll label, or page output |
| Export PDF | Generate the final print-ready PDF |
| Save | Save the current design or template when available |
2. Sidebar Tabs
Use the sidebar to move between data, templates, design controls, print settings, and help.
| Panel tab | What's inside |
|---|---|
| Data Source | Current rows and fields; open the Data Manager from here |
| Templates | Ready-made layouts and saved designs |
| Design | Add text, dynamic text templates, image, shape, barcode, and QR code elements |
| Style | Edit the selected element's typography, color, borders, and appearance |
| Print Layout | Paper size, label size, rows, columns, gaps, margins, Avery presets, thermal label sizes, and start position |
| History | View recent PDF exports and save a previous export again when available |
| Guide | In-editor quick-start help |
3. Canvas (Center)
In Design Label mode, the white area in the middle is one label, tag, badge, card, or sticker.
- Click any element to select it and reveal its settings in the sidebar.
- Drag elements to reposition them.
- Use corner handles to resize.
- Add fixed content, bind an element to a spreadsheet column, or use text templates such as
{{product_name}} - ${{price}}.
4. Data Manager
Use Edit Data when you need to import rows, map columns, paste CSV, link local images, or generate multiple labels from a quantity column.
- Import from Google Sheets, Excel, CSV, XML, URL, or pasted rows.
- Use Generate Labels by Quantity Column when one row needs multiple labels.
- Keep image columns and label text fields in the same row so each exported label stays predictable.
5. Print Layout Preview
Use Print Layout to check the whole sheet before exporting.
- Confirm the selected paper size and label preset.
- Check rows, columns, gaps, and margins.
- Set the first label position when printing on a partially used sheet.
- Page through multi-page jobs before generating the PDF.
6. Export History
After exporting, open History or Export History from the sidebar to view recent PDF exports. History is stored locally, so re-export when you change data, layout, or print settings.
[!TIP] The same workspace powers related product-label, barcode, QR, and sheet-layout workflows, so the controls stay familiar across those pages.
Next Step
Now that you know the layout, follow the Quick Start to create your first label.