
To make shipping labels from Excel or Google Sheets, prepare a clean spreadsheet with recipient, address, and tracking fields, choose a shipping label format such as 4x6, import the spreadsheet, map the fields onto the label, preview the full batch, and print the PDF at 100% / Actual Size.
If you want the shortest browser-first workflow, start with Shipping Label Maker.
Whether your rows start in Excel or Google Sheets, the practical workflow is the same: clean the spreadsheet, choose the shipping format, map the fields, preview the batch, and print the exported PDF correctly.
If you need a general Google Sheets label workflow before focusing on shipping-specific fields, read How to Print Labels from Google Sheets.
The key steps are:
- Prepare a clean spreadsheet with shipping fields
- Choose the shipping label format, usually
4x6 - Upload the Excel file or connect Google Sheets
- Map recipient, sender, and tracking fields
- Preview the full batch before export
- Print at
100%scale orActual Size
Most teams are trying to solve one practical job:
- they already have orders or shipment rows in a spreadsheet
- they need printable parcel labels, not a Word mail merge
- they want a
4x6layout for thermal printers or sheet output - they need a clean PDF that stays aligned when printed
That is why the best workflow is usually not "design labels inside Excel or Google Sheets."
The real workflow is:
- prepare the spreadsheet well
- choose the right shipping format
- map the shipping fields onto the label
- export a print-ready PDF
What you'll need
- one row per shipment
- clear headers such as
recipient_name,street_1,city,state,zip, andtracking_number - a shipping label layout such as
4x6 - a workflow that can preview the full output before printing
Part 1: Prepare your spreadsheet
Whether your source is Excel or Google Sheets, the structure matters more than the file type.
Recommended column structure
Typical columns for printable shipping labels:
order_idrecipient_namecompany(optional)street_1street_2(optional)citystatezipcountrytracking_number(optional)service_level(optional)sender_name(optional)sender_street(optional)
You do not need every field on every label, but one row should always represent one shipment.
Data cleaning checklist
Before you generate labels, check these:
- keep one row per shipping label
- avoid merged cells
- use plain text headers in row 1
- remove fully blank rows
- keep ZIP or postal codes as text if they can start with
0 - keep tracking numbers as plain text so long values do not get reformatted
If your source is mainly mailing addresses rather than parcel labels, the better workflow is How to Make Address Labels from Excel or Google Sheets and Address Label Maker.
Part 2: Choose the shipping label format
The second step is matching the label to the printer and paper you will actually use.
Common choices include:
4x6thermal shipping labels- US Letter sheet layouts with multiple shipping labels per page
- A4 shipping label sheets
- custom label sizes for warehouse or internal logistics jobs
If you are not sure where to start, Shipping Label Maker is the clearest entry point for printable shipping labels from spreadsheet data.
This workflow is best for printable shipping labels and shipping-style PDFs. It is not a carrier checkout or postage-purchase flow.
Part 3: Import Excel or connect Google Sheets
Excel workflow
If your shipment data is in Excel:
- save the workbook as
.xlsxor.xls - open Shipping Label Maker
- start from the shipping template
- upload the file and review the imported columns
Google Sheets workflow
If your shipment data is in Google Sheets:
- open Shipping Label Maker
- choose the spreadsheet import path
- connect the sheet or use the standard import flow
- select the worksheet that contains the shipping rows
The file type is different, but the printing workflow after import is basically the same.
If you need the broader Google Sheets tutorial version, read How to Print Labels from Google Sheets.
Part 4: Map the shipping fields onto the label
Once the spreadsheet is loaded, place the shipping fields onto the layout.
Typical mapping looks like this:
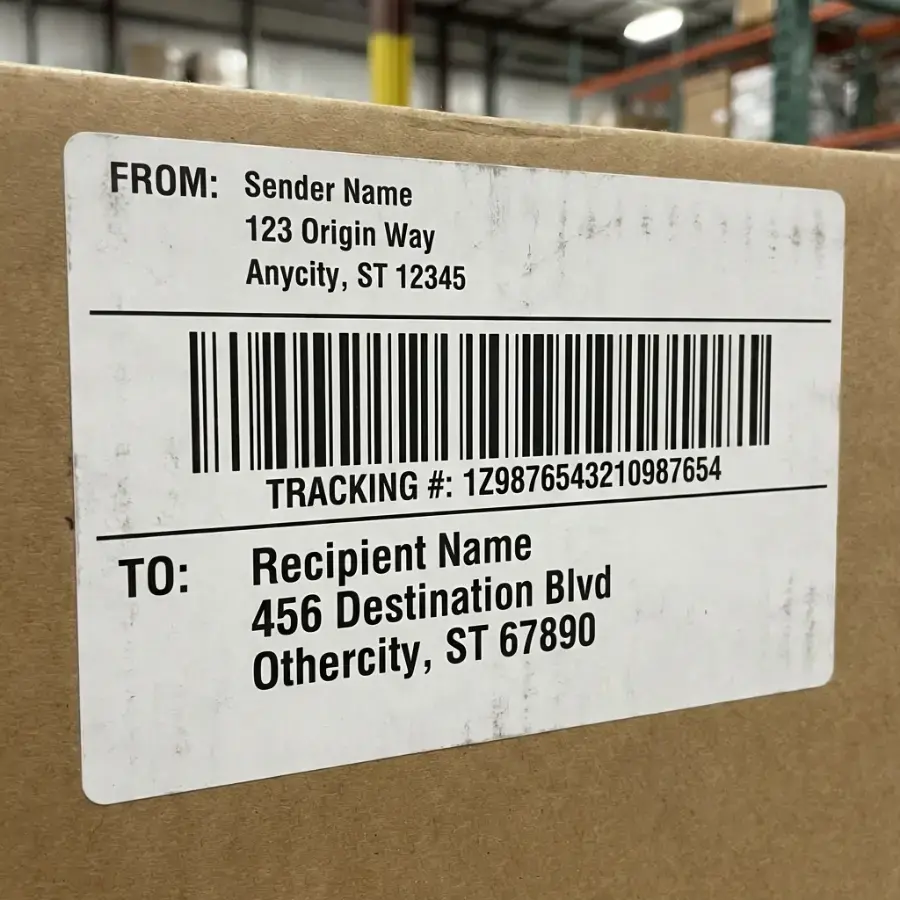
recipient_namein the main destination blockcompanybelow the recipient when neededstreet_1andstreet_2in the address blockcity,state,zip, andcountryon the final address linetracking_numberin the barcode or tracking areasender_nameand sender address in the return block when needed
This is the step where a dedicated shipping-label workflow is much easier than rebuilding a parcel label manually in Docs, Word, or a spreadsheet grid.
Part 5: Preview the full batch before printing
Do not skip the preview step.
Check for:
- long recipient names wrapping badly
- tracking numbers overflowing the barcode area
- blank rows creating blank labels
- postal codes losing leading zeros
- paper size mismatches between the PDF and your printer
For shipping labels, layout errors are usually easier to catch in preview than after you waste label stock.
If the preview shows drifting rows or off-center output, fix that before the final run with How to Fix Label Printing Misalignment.
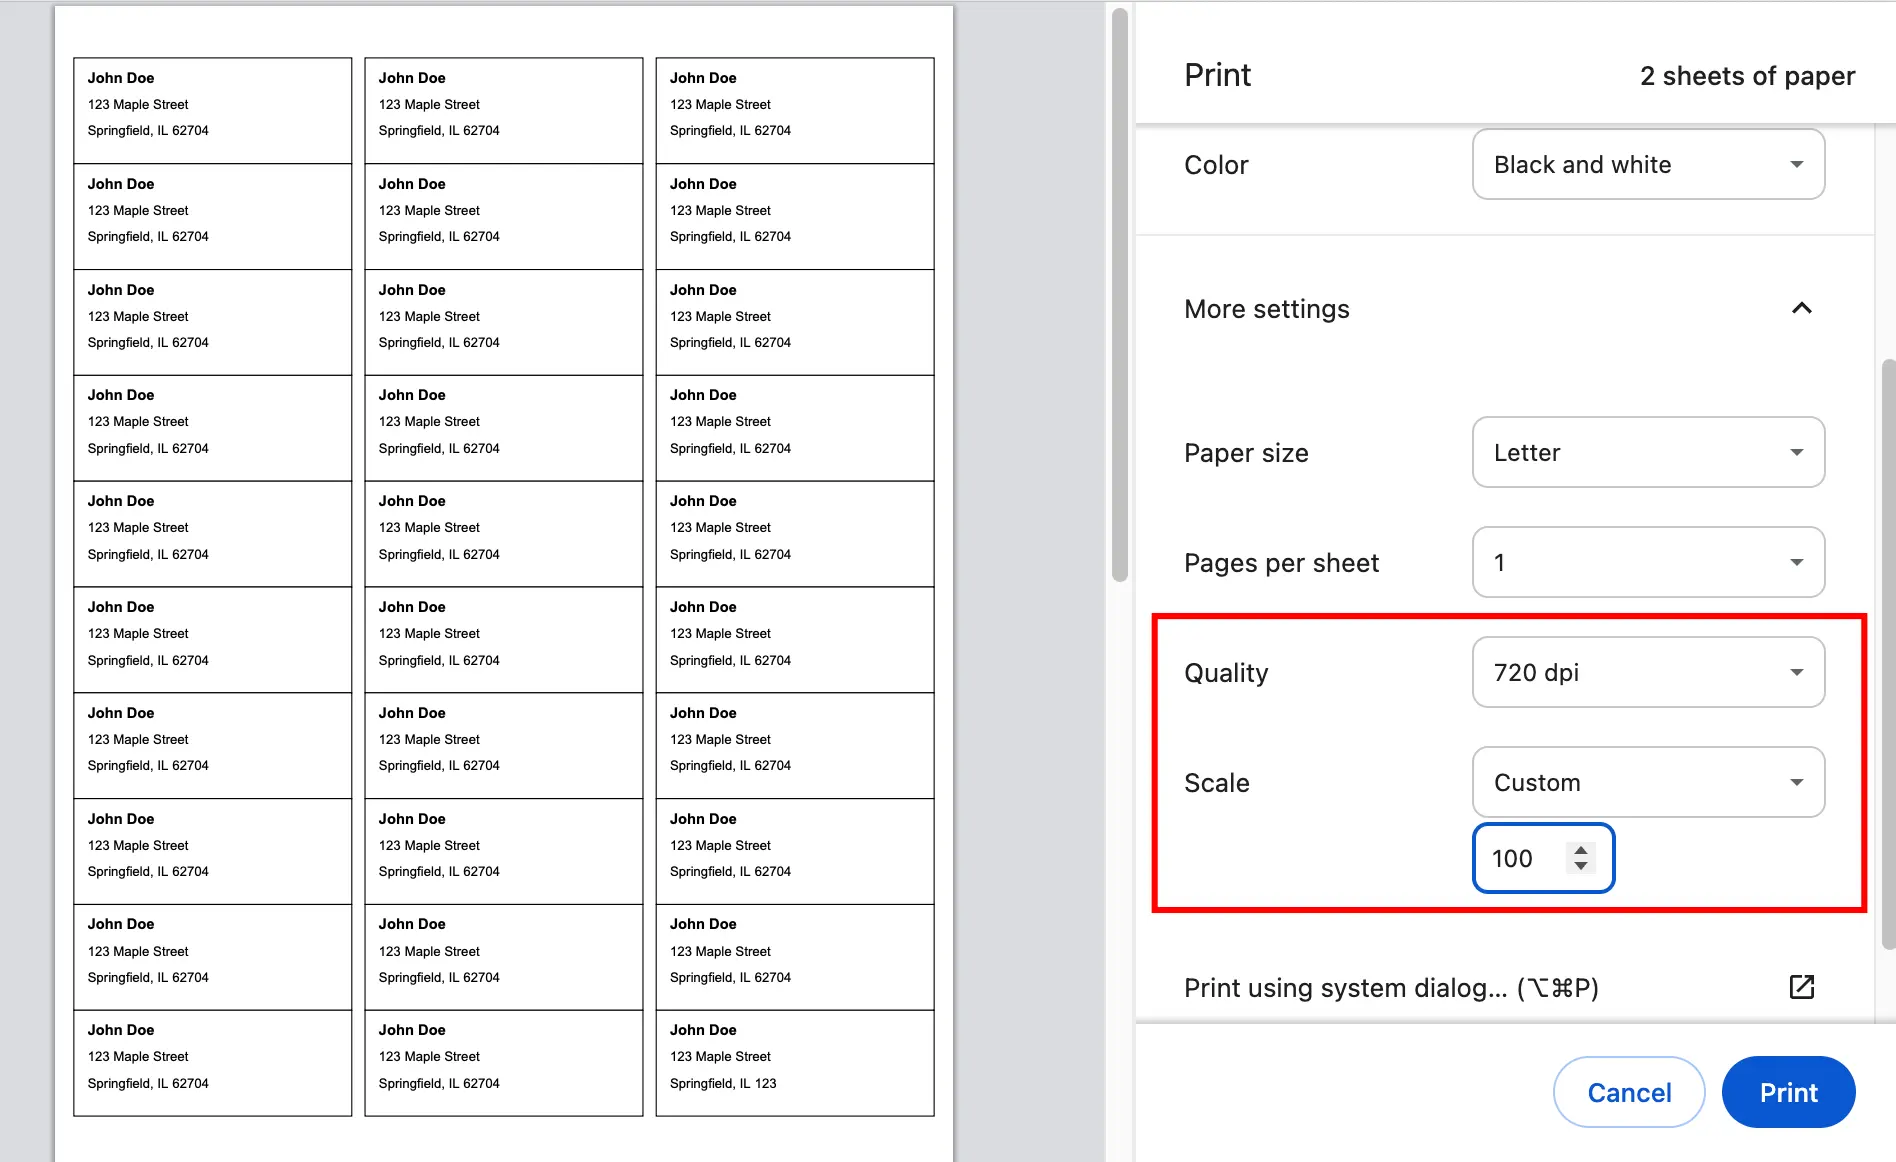
Part 6: Export PDF and print at 100% scale
After the preview looks correct:
- export the final labels as PDF
- open the PDF in your print dialog
- set scale to
100%orActual Size - print one test label on plain paper first
- compare the test print against your actual label stock
If alignment is still off, use Fix Misaligned Labels.
The short version is simple: print at 100% or Actual Size, not Fit.
Do I need carrier software to do this?
Not necessarily.
That is the main gap between the job you need done and what many shipping workflows assume.
Sometimes you do not need to buy postage inside the tool. You only need:
- a clean printable shipping label layout
- a barcode or tracking block
- a fast way to turn order rows into print-ready PDFs
That is where a spreadsheet-to-label workflow helps.
Common problems and fixes
My tracking numbers look wrong
Keep tracking fields as text in Excel or Google Sheets before importing. Long numeric values should not be treated like normal numbers.
My labels are slightly misaligned
Most of the time this is a print settings issue, not a data issue. Make sure the PDF is printed at 100% or Actual Size, not Fit.
My address block is too long
Use street_2 for apartment, suite, or unit details. That gives the destination block more room and reduces ugly wrapping.
I need mailing labels, not shipping labels
Use Address Label Maker if the job is really an address-sheet workflow instead of a parcel label workflow.
Frequently asked questions
Can I make shipping labels directly from Excel?
Yes, but Excel is usually the data source, not the final shipping-label layout tool. The practical workflow is to import the Excel file into a shipping-label workflow and export a print-ready PDF.
Can I make shipping labels from Google Sheets without exporting CSV?
Yes. You can connect Google Sheets directly or bring the spreadsheet in through the standard import flow.
Can I print standard 4x6 shipping labels?
Yes. 4x6 is one of the most common formats for thermal shipping printers and is usually the best starting point.
Does this buy USPS, UPS, or FedEx postage?
No. This workflow is for printable shipping labels and shipping-style PDFs. It does not replace carrier checkout or postage purchase.
Do I need special software installed?
No. A browser-based workflow such as Shipping Label Maker can handle the import, layout, preview, and PDF export workflow without installing desktop label software.
Make shipping labels faster
If your goal is simply to turn spreadsheet rows into print-ready parcel labels, start with Shipping Label Maker. It supports Excel, Google Sheets, and CSV imports, 4x6-style shipping layouts, batch preview, and PDF export.