
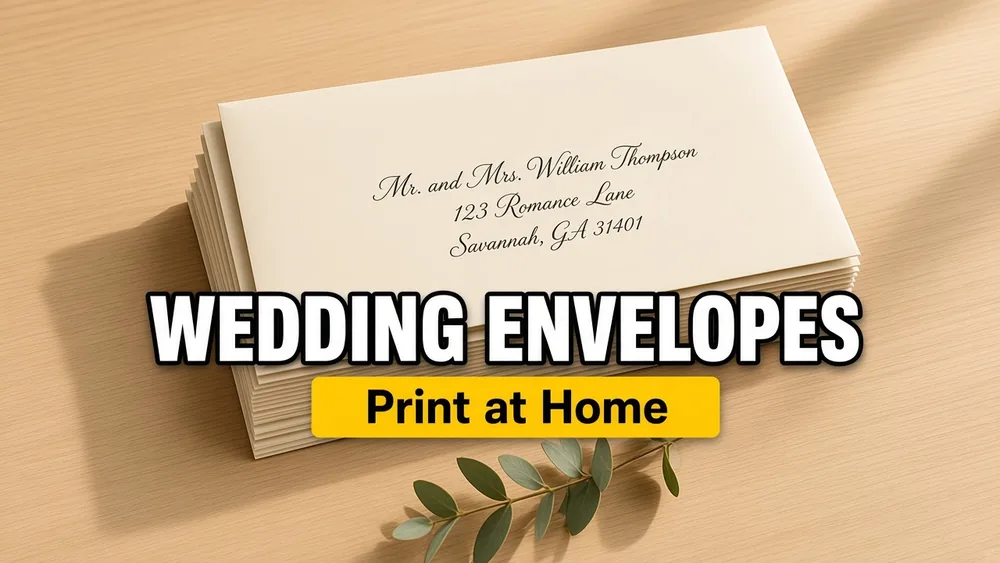
Hiring a calligrapher to hand-address 150 wedding envelopes costs $300–$800 and takes weeks. Printing them yourself at home takes an afternoon, looks elegant with the right font, and costs next to nothing.
This guide covers everything: which envelope size to use, which fonts look like calligraphy, how to set up the print, and how to avoid the common mistakes that waste expensive invitation envelopes.
Which Envelope Size for Wedding Invitations?
| What You're Mailing | Envelope Size | Dimensions |
|---|---|---|
| 5x7 invitation suite | A7 | 184 x 133 mm (7¼ x 5¼ in) |
| RSVP reply card | A2 | 146 x 111 mm (5¾ x 4⅜ in) |
| Save-the-date (postcard style) | A6 | 165 x 121 mm (6½ x 4¾ in) |
| Oversized invitation suite | A9 | 222 x 146 mm (8¾ x 5¾ in) |
A7 is the most popular wedding envelope. It fits the standard 5x7 inch invitation card, a vellum wrap, a details card, and a small RSVP card with envelope.
Best Fonts for Wedding Envelopes
The right font makes printed envelopes look hand-lettered. Here are proven choices:
Script / Calligraphy Fonts (Formal)
- Great Vibes — flowing calligraphy, excellent readability
- Alex Brush — elegant with good weight
- Parisienne — romantic, slightly thick strokes
- Allura — modern calligraphy with clear letterforms
- Pinyon Script — traditional copperplate style
Serif Fonts (Classic)
- Playfair Display — high-contrast, editorial elegance
- Cormorant Garamond — refined and lightweight
- EB Garamond — timeless book-quality serif
Sans-Serif (Modern / Minimalist)
- Montserrat — geometric, clean, contemporary
- Raleway — thin weight looks luxurious
- Josefin Sans — art deco feel
Tip: Use a script font for the guest name and a clean serif or sans-serif for the address lines. This creates visual hierarchy without sacrificing readability.
Step-by-Step: Print Wedding Envelopes
1. Prepare Your Guest List
Export your guest list from your planning tool (The Knot, Zola, WeddingWire, Google Sheets, or Excel). Make sure you have columns for:
- Guest name (formal: "Mr. and Mrs. John Smith" or casual: "The Smith Family")
- Street address
- City
- State
- ZIP code
Etiquette tip: For formal weddings, use full names without abbreviations ("Michigan" not "MI", "Street" not "St.").
2. Open the Envelope Printing Tool
Go to Print Envelopes from Excel.
Set the size to your envelope dimensions:
- A7: Width = 184 mm, Height = 133 mm
- A2 (RSVP): Width = 146 mm, Height = 111 mm
3. Import Your Guest List
Upload your Excel or CSV file. Map the columns to the address fields. Each row generates one envelope.
4. Style the Text
- Choose a script font for guest names (Great Vibes, Allura, etc.)
- Set recipient address text to 14–16pt for readability
- Center the address block slightly below the middle of the envelope
- Keep 15–20 mm margins from all edges (printer non-printable area)
5. Add Return Address (Optional)
Add your return address in the top-left corner or on the back flap. For the return address, use a simpler font at 9–11pt.
Common return address formats:
- "The Future Mr. & Mrs. Smith"
- "Sarah Johnson & Michael Chen"
- "The Johnson-Chen Family"
- Just the address (no names)
6. Test Print on Plain Paper
This step is non-negotiable. Wedding envelopes are expensive ($0.30–$1.00+ each).
- Print 2–3 test pages on plain paper
- Hold the printed paper against a real envelope over a light
- Verify text positioning and margins
- Check font readability at the chosen size
- Confirm the envelope feeds correctly in your printer
7. Print the Final Batch
- Print 5 envelopes first, check quality, then do the rest
- Feed one at a time if your printer is finicky
- Have 10–15% extra envelopes for mistakes and last-minute additions
Printer Setup for Wedding Envelopes
Wedding envelopes (A7) are thicker and squarer than standard business envelopes, so feeding can be tricky.
General guidance:
- Use the manual feed / priority tray
- Set paper type to "Envelope" or "Thick Paper"
- Set paper size to custom: 184 x 133 mm (or 7.25 x 5.25 in)
- Disable duplex printing
- Use the straight-through paper path if available
See our complete printer feeding guide by brand for HP, Brother, Canon, and Epson specifics.
Common Wedding Envelope Printing Mistakes
| Mistake | Fix |
|---|---|
| Text too small (10pt or less) | Use 14–16pt for recipient, 10–12pt for return address |
| Scaling set to "Fit to Page" | Always print at Actual Size / 100% |
| Wrong envelope orientation | A7 is landscape (wider than tall) |
| Not enough margin from edges | Keep 15mm+ from all edges |
| Using self-seal envelopes | The adhesive strip can melt in laser printers — use moistenable-glue or peel-and-seal envelopes rated for laser |
| Printing the whole batch without testing | Always test on plain paper first |
Wedding Envelopes vs Labels vs Calligraphy
| Method | Cost (150 envelopes) | Time | Look |
|---|---|---|---|
| Print directly on envelopes | ~$0 (printer ink) | 1–2 hours | Professional, elegant with script fonts |
| Hand calligraphy | $300–$800 | 2–4 weeks | Premium, one-of-a-kind |
| Printed address labels | ~$15 (label sheets) | 30 min | Clean but visible label edges |
| Handwriting | $0 | 5+ hours | Personal but inconsistent |
For most couples, printing directly on envelopes gives the best balance of elegance, speed, and cost.
Inner vs Outer Envelopes
Traditional formal weddings use two envelopes:
- Outer envelope: Full formal names and mailing address (goes through the post)
- Inner envelope: Guest names only, no address (goes inside the outer envelope)
If you use this format, print the outer envelopes with full addresses from your spreadsheet, and print the inner envelopes with just names (use only the name column).
Ready to Print?
- Print Envelopes from Excel — open the tool and choose A7 for wedding envelopes
- Envelope Size Reference — check all standard sizes
- Wedding Return Address Labels — if you prefer labels for the return address
- How to Print Address Labels from The Knot — export guest lists from wedding planning tools