
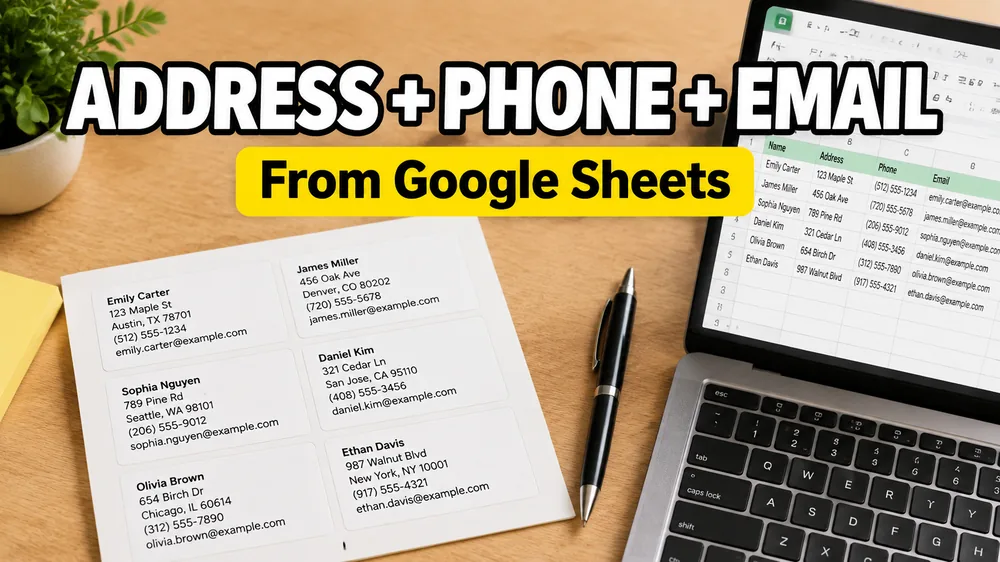
To design address labels with phone and email from Google Sheets, keep one recipient per row, import the sheet, choose the label stock, and design one reusable address label. The designer then replaces the fields with values from every spreadsheet row.
This guide focuses on the step that often causes trouble after a successful import: arranging separate name, address, phone, and email columns into the exact label layout you want. You do not need a barcode, QR code, logo, or special text.
If you only need a standard postal address block, Address Label Maker is the shorter workflow. Use this custom design guide when you need extra contact lines, separate first and last name fields, or more control over how the fields are combined and positioned.
Quick Answer
Add a text element, double-click it to open Quick Edit Text, and choose a spreadsheet column. When one line needs multiple columns, choose Custom text (combine fields) and click the field buttons in the order you want. For example, combine first and last names as {{First Name}} {{Last Name}}, or build a mailing line as {{City}}, {{State}} {{Zip Code}}.
This guide matches a common request:
First Name    Last Name
Address
City    State   Zip Code
Country

Telephone Number
Email address
The words above describe the data that should appear on the label. The label itself can show only the values, or you can add optional prefixes such as Phone: and Email:.
Download a Ready-to-Test CSV
Use the custom address label sample CSV to try the workflow before connecting your own sheet. It contains fictional names and test contact details, so it is safe to use for a preview or a plain-paper test.
The first row contains the column headers. Each following row becomes one label:
| First Name | Last Name | Address | City | State | Zip Code | Country | Telephone Number | Email Address |
|---|---|---|---|---|---|---|---|---|
| Jordan | Lee | 120 Market Street | Boston | MA | 02110 | United States | +1 617-555-0142 | [email protected] |
| Maria | Garcia | 48 Willow Lane | Austin | TX | 78701 | United States | +1 512-555-0188 | [email protected] |
| Ethan | Patel | 905 Cedar Avenue | Chicago | IL | 60611 | United States | +1 312-555-0167 | [email protected] |
| Olivia | Chen | 17 Harbour Road | Toronto | ON | M5V 2T6 | Canada | +1 416-555-0129 | [email protected] |
| Noah | Wilson | 73 Park View | London | ENG | SW1A 1AA | United Kingdom | +44 20 7946 0123 | [email protected] |
Keep the headers in Row 1 and use one person per row. Store ZIP or postal codes as text when they can begin with zero, such as 02110.
Step 1: Import the Sheet
Open Label Designer and import your Google Sheet, or upload the CSV sample. When the data preview appears, confirm that the columns are separate and that the ZIP code has not lost its leading zero.
You are importing the list, not a finished design. Google Sheets holds the values; Label Designer controls their position, font, and spacing.
Google Sheets Label Maker
Design and print labels directly from Google Sheets rows. Add text, barcodes, QR codes, or images, and export print-ready PDFs.
Step 2: Choose the Address Label Sheet
Choose the label stock that matches the paper in your printer. A standard 30-label US Letter address sheet is a practical starting point for mailing labels. If your package has a different product number or dimensions, choose that exact compatible layout instead.
For a custom label, set the width and height in Print Settings. Leave enough height for seven lines and a small blank gap before the phone number.
Do not add barcode, QR code, image, or shape elements for this design. You only need text.
Step 3: Double-Click a Text Element to Open Quick Edit
- Add a Text element to the label canvas.
- Move and resize the text box roughly where you want the first line.
- Double-click the text element on the canvas. This opens Quick Edit Text immediately.

A single click selects the element for moving, resizing, and styling. A double-click opens the faster content editor shown above.
The field buttons are generated from your imported column headers. The screenshot uses headers such as first_name; the sample CSV in this guide uses First Name. Use the buttons shown in your own Quick Edit window rather than renaming columns to match the screenshot.
In Connected to column, choose the editing mode that matches the line:
- For a text element that shows only one value, choose a single column such as
Address,Country, orEmail Address. - For a text element that combines two or more values, choose Custom text (combine fields).
Step 4: Combine Fields in Quick Edit
For the name line, choose Custom text (combine fields). In Text Content, you can build the line in either of two ways:
- Click the
First Namefield button, type a space, then clickLast Name. - Type the complete template manually, making sure every field name exactly matches its spreadsheet header.
Both methods produce:
{{First Name}} {{Last Name}}The field buttons insert the correct {{ }} syntax for you. Click the buttons in any order, then type normal spaces, punctuation, fixed words, or line breaks around them. For example:
{{Last Name}}, {{First Name}}
{{First Name}} {{Last Name}} - {{Country}}
Phone: {{Telephone Number}}
You can also click several field buttons and rearrange the inserted tokens inside Text Content. Text outside {{ }} repeats on every label; fields inside {{ }} change with each spreadsheet row.
If you prefer one movable address block, Quick Edit also accepts multiple lines in one text element:
{{First Name}} {{Last Name}}
{{Address}}
{{City}}, {{State}} {{Zip Code}}
{{Country}}
Using separate text elements gives you more control over font size and vertical spacing. Using one multi-line element makes the whole block easier to move. Both approaches use the same field buttons and template syntax.
Step 5: Build the Complete Label
For the six-element layout, double-click each text element and configure it like this:
| Text element | Connected to column | Text Content |
|---|---|---|
| Name | Custom text (combine fields) | {{First Name}} {{Last Name}} |
| Street | Address | {{Address}} |
| City/state/ZIP | Custom text (combine fields) | {{City}}, {{State}} {{Zip Code}} |
| Country | Country | {{Country}} |
| Telephone | Telephone Number | {{Telephone Number}} |
| Email Address | {{Email Address}} |
The combined address fields should look like this:
{{Address}}
{{City}}, {{State}} {{Zip Code}}
{{Country}}
The comma after {{City}} and the space between state and ZIP are fixed characters. If you prefer the exact visual spacing in the request, use {{City}} {{State}} {{Zip Code}}, but a single-space format is usually easier to read on a small label.
Align these text boxes to the same left edge. If the address can be long, turn on Shrink to fit or increase the label size before exporting.
Leave a small vertical gap after the country line, then add two text elements:
{{Telephone Number}}
{{Email Address}}
If the label needs clearer context, use these optional versions instead:
Phone: {{Telephone Number}}
Email: {{Email Address}}
Use a smaller font for the email line if long addresses need more room. Do not place the phone and email in separate spreadsheet rows; they should remain fields in the same person row.
Step 6: Check the Field Mapping
Preview several rows and verify each connection:
| Label line | Template |
|---|---|
| Name | {{First Name}} {{Last Name}} |
| Street | {{Address}} |
| City/state/ZIP | {{City}}, {{State}} {{Zip Code}} |
| Country | {{Country}} |
| Telephone | {{Telephone Number}} |
{{Email Address}} |
The field names inside the double braces must match the spreadsheet headers exactly. If a value is blank, check the header spelling first. Do not add braces around a header that does not exist.
Step 7: Preview and Print
Use the full-sheet preview before exporting. Check the longest name, longest street address, international postal code, telephone number, and email address. A label that looks correct for the first row may still need a wider text box for another row.
When the preview is correct:
- Export the PDF.
- Print one test page on plain paper.
- Set printer scaling to 100% or Actual Size.
- Turn off Fit to Page and Shrink to Fit.
- Hold the test page over the label stock to confirm alignment.
Common Problems
I imported the data, but I still see a blank label
Importing only loads the rows. Add a text element and connect it to a column, or use the combined-field templates above.
My first and last names appear on separate lines
Use one text element with {{First Name}} {{Last Name}}. Do not use two stacked elements unless you intentionally want two lines.
The ZIP code lost its leading zero
Format the ZIP or postal-code column as plain text in Google Sheets, then re-import the data. A number format cannot preserve a leading zero after it has been removed.
The email runs outside the label
Widen the email text box, reduce its font size, enable Shrink to fit, or use a larger label. Preview the longest email address before printing the batch.
I do not want any labels for blank rows
Remove blank rows from the sheet before importing. Keep one complete contact per row.
The Shortest Reliable Setup
For this exact address label with phone and email, the complete design is:
{{First Name}} {{Last Name}}
{{Address}}
{{City}}, {{State}} {{Zip Code}}
{{Country}}

{{Telephone Number}}
{{Email Address}}
That is the whole label. Design it once, preview it with real rows, and export the repeated labels from Label Designer.
Related guides: