
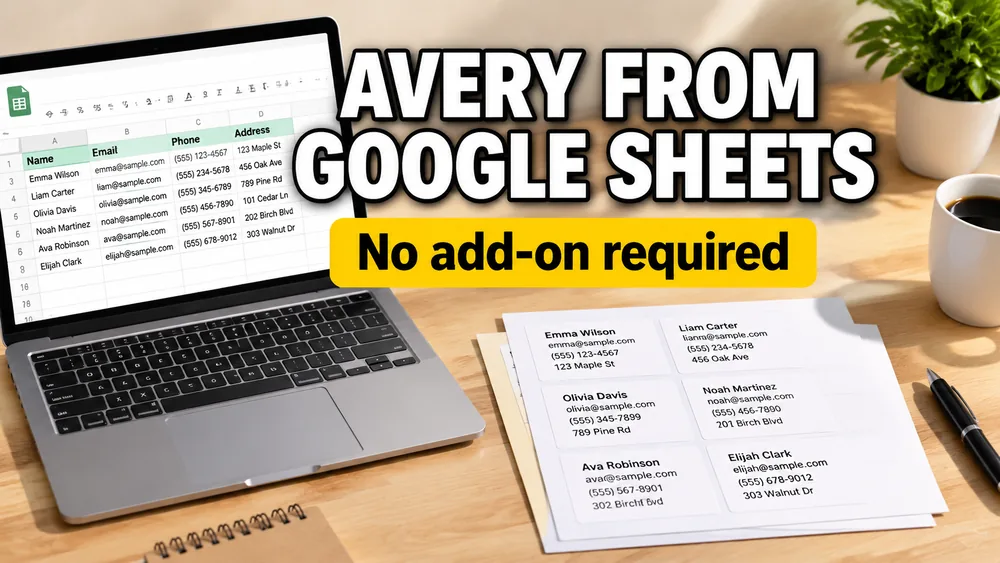
To create Avery®-compatible labels from Google Sheets, prepare one clean row per label, open a label maker that supports Google Sheets, choose the matching compatible layout, design one reusable label, bind spreadsheet fields or dynamic text templates to the canvas elements, preview the full label sheet, export a PDF, and print at 100% / Actual Size.
Trademark note: This program is not made, tested or endorsed by Avery Products Corporation. Avery and all Avery brands, product names and codes are trademarks of CCL Label, Inc. Product names and codes are referenced only to describe compatible label layouts.
This guide is for compatible label sheets that need more than a fixed address block: product labels, classroom labels, inventory labels, QR labels, barcode labels, branded mailing labels, and other layouts where you want to place fields visually.
If you are still learning the general workflow, start with How to Print Labels from Google Sheets. If you specifically need plain mailing labels, use How to Print Address Labels from Excel or Google Sheets. If you already know you are printing the 30-up Avery® 5160® Address Labels layout, read Avery® 5160® Address Labels from Excel or Google Sheets.
Short Version
- Open your Google Sheet.
- Make sure Row 1 contains clear headers.
- Start from Google Sheets to Labels or Address Label Maker.
- Choose the compatible label template.
- Bind fields such as name, address, SKU, price, or barcode onto the label.
- Preview the full sheet.
- Export the PDF.
- Print with scaling set to
100% / Actual Size.
Prepare the Google Sheet
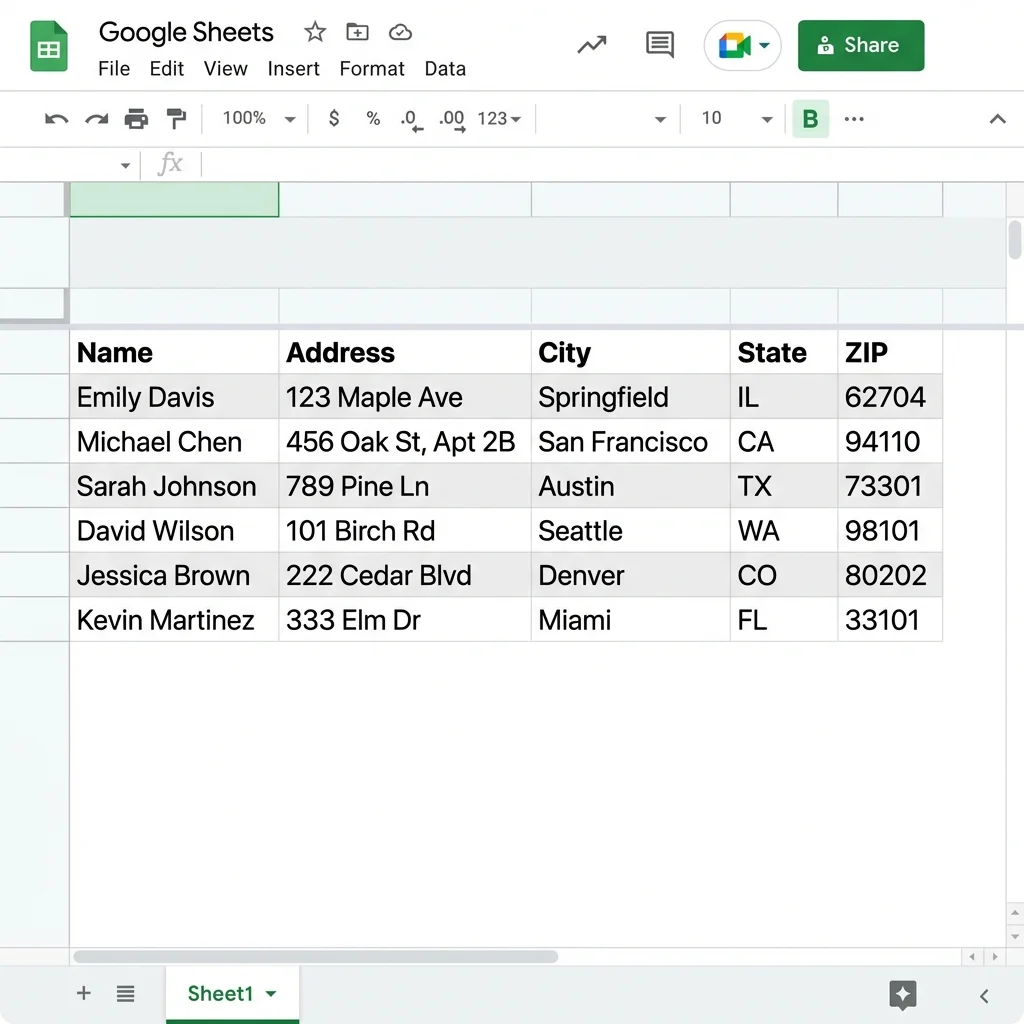
The best spreadsheet label workflow starts with simple data. Use one row for each label and keep the first row as field names.
For address labels, a practical sheet looks like this:
| full_name | address_line_1 | address_line_2 | city | state | zip |
|---|---|---|---|---|---|
| Jordan Lee | 120 Market Street | Suite 400 | Boston | MA | 02110 |
For product or inventory labels, use columns like:
| product_name | sku | price | barcode |
|---|---|---|---|
| Organic Soap | SOAP-042 | $8.00 | 10000042 |
Before importing, check for:
- blank rows between real records
- merged cells
- inconsistent header names
- ZIP codes that lost leading zeros
- very long text that may not fit on small labels
Choose the Right Compatible Template
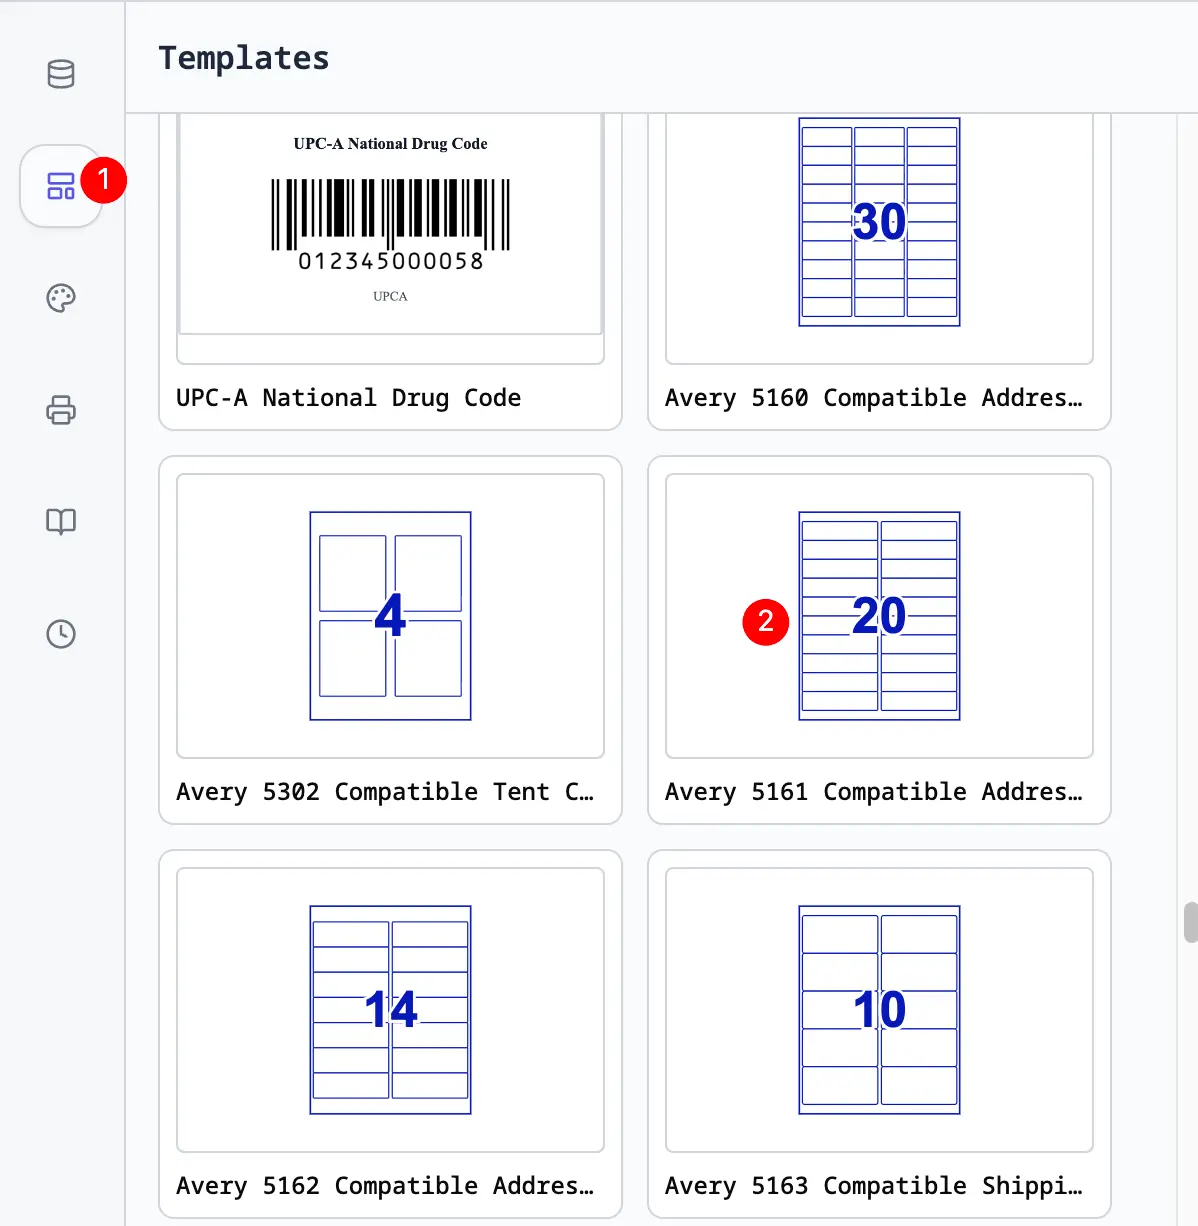
Template product numbers describe a physical sheet layout. The most common mailing-label layout in the United States is the Avery® 5160® Address Labels layout, but it is not the right choice for every package.
Choose the template that matches your physical label stock:
- Avery® 5160®-compatible labels for common 30-up address sheets
- larger address labels for longer mailing addresses
- return address labels for sender labels
- product label sheets for jars, bags, boxes, and packaging
- custom layouts when the package does not match a standard preset
If you are not sure which layout you need, start with the Avery®-Compatible Label Sizes Chart & Templates Guide.
Design the Label Visually
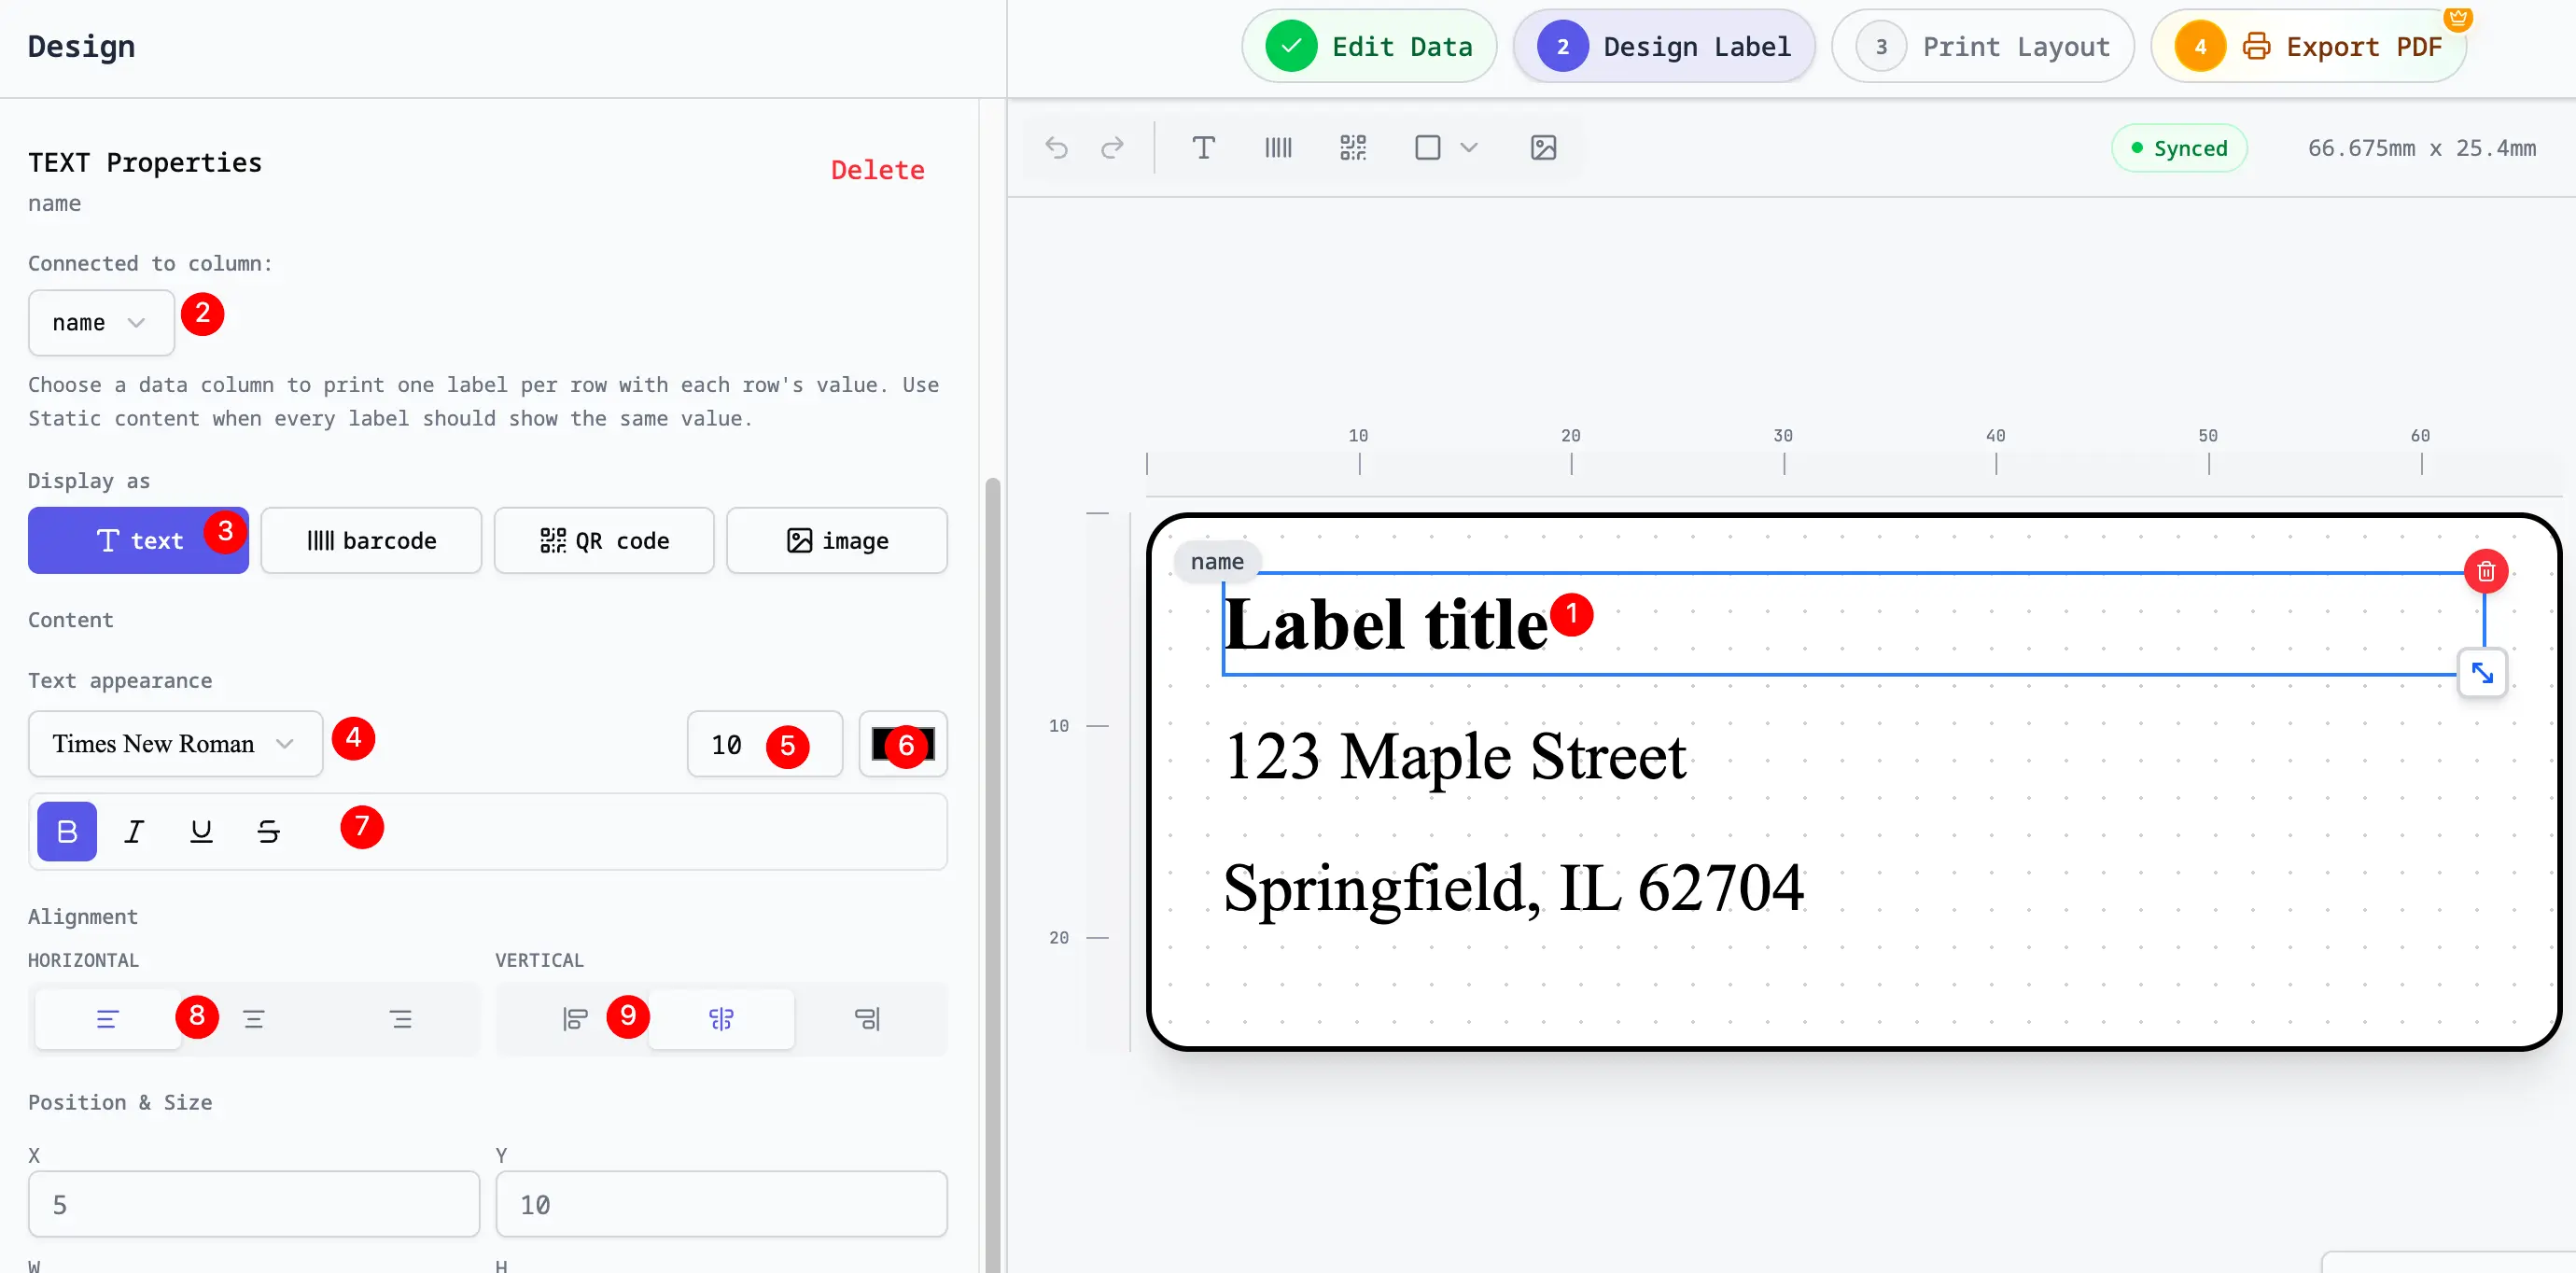
After importing the sheet, design the label on a visual canvas instead of writing merge syntax by hand. This is the main difference between a spreadsheet-powered label editor and an old mail merge workflow.
In SheetsToLabels, you can:
- drag text, image, barcode, and QR elements onto the label
- bind each element to a Google Sheets column
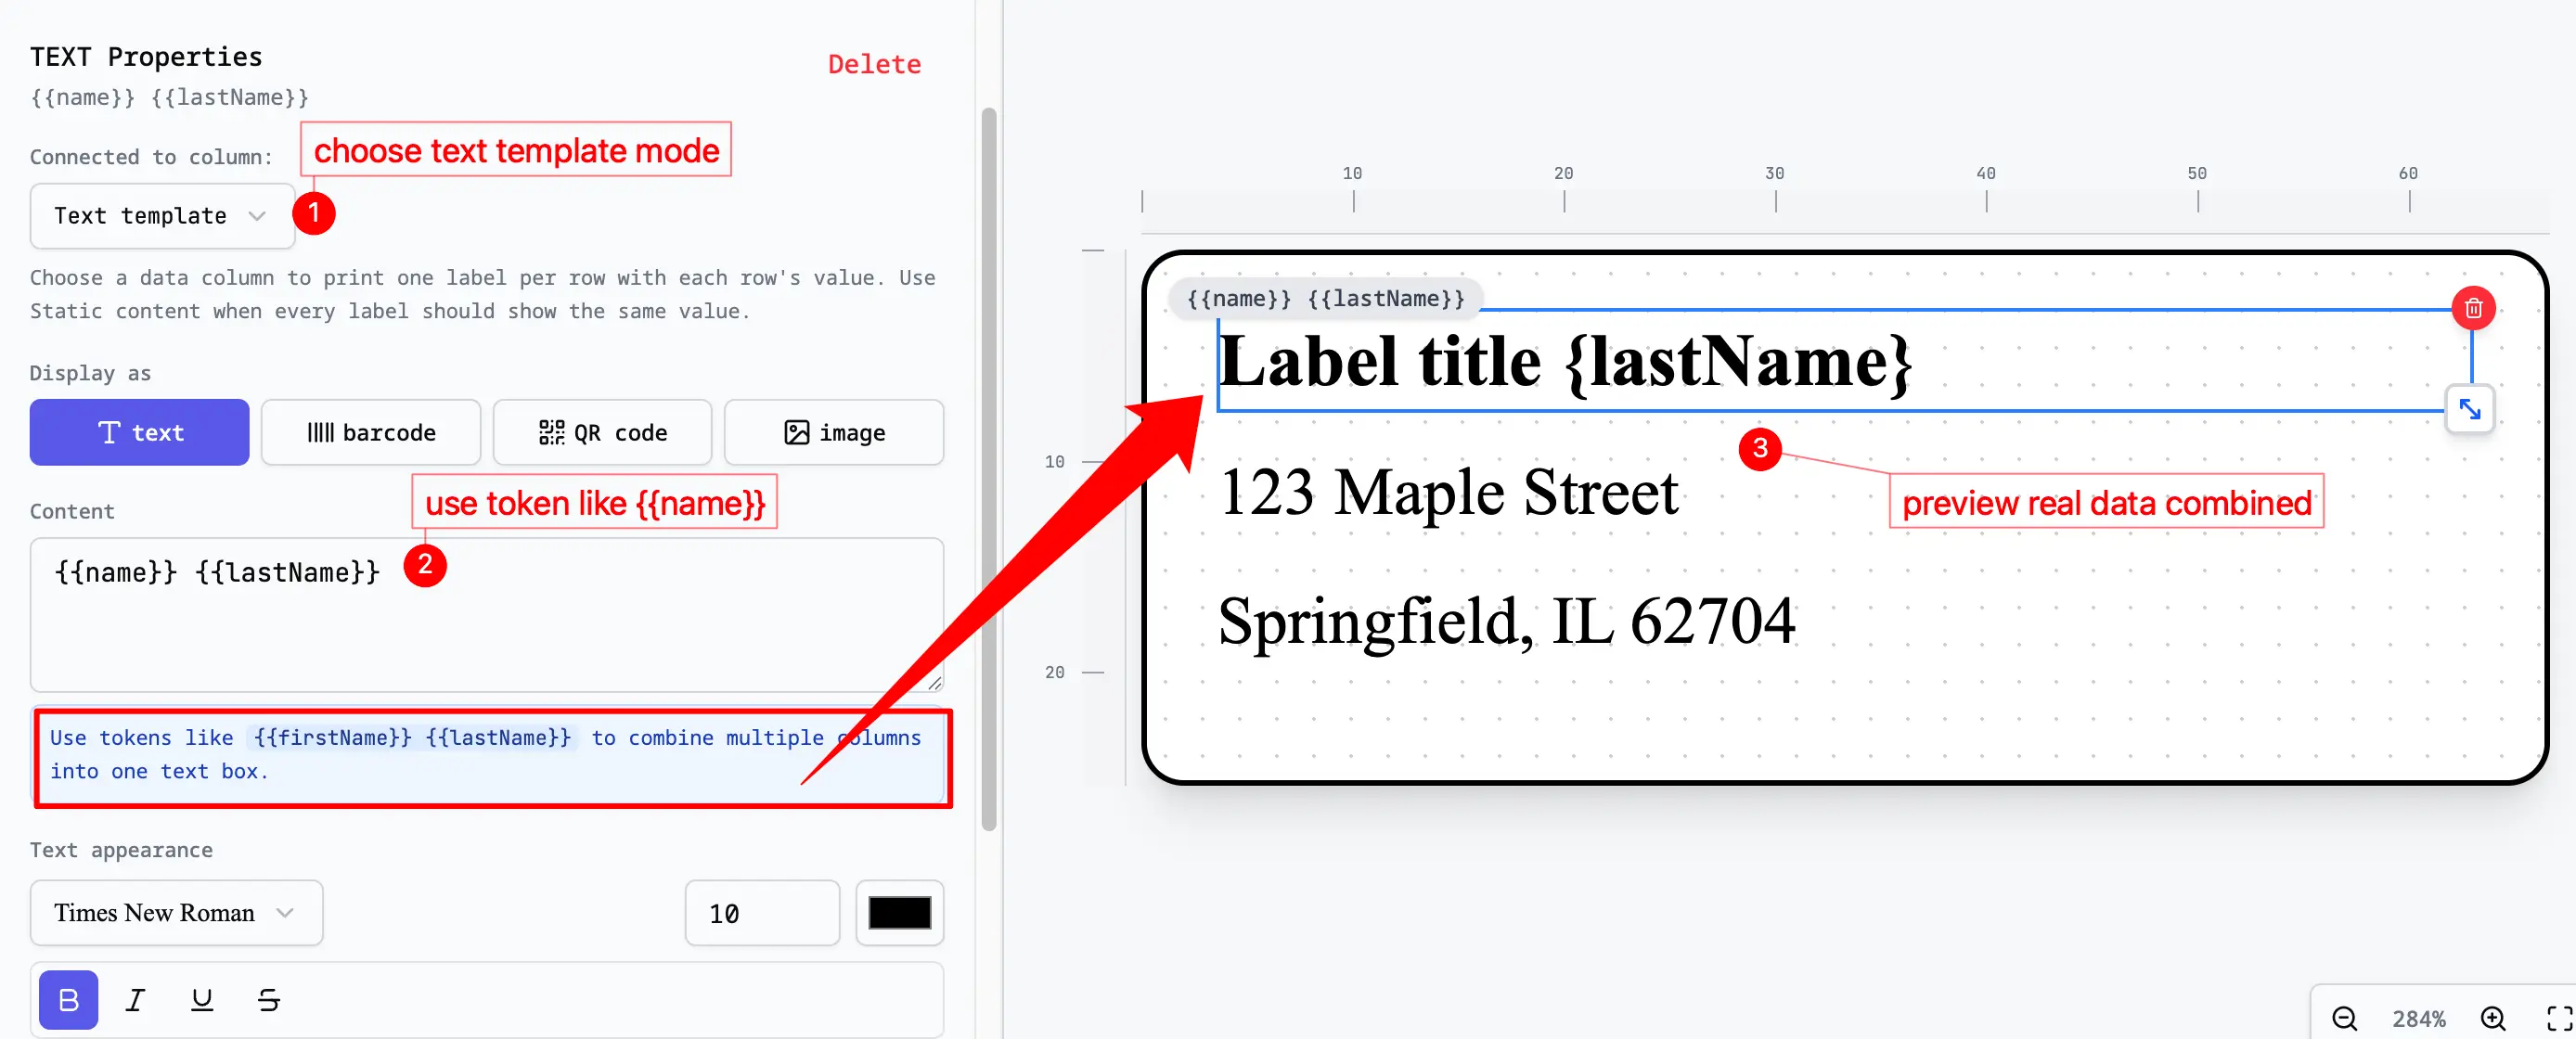
- combine fields in one text template, such as
{{city}}, {{state}} {{zip}} - add shapes such as ribbons, badges, dividers, arrows, or tag-hole details
- resize and reposition fields directly on the canvas
- preview real row data while you edit
- switch to full-sheet preview before exporting
That makes the workflow closer to a WYSIWYG label designer than a document merge. You can see where the SKU, address, price, logo, barcode, or QR code will actually print.
Map Google Sheets Columns to Label Elements
Once the layout is visible, connect each spreadsheet column to the correct label element.
Common address mappings:
full_nameto the first linecompanyto an optional second lineaddress_line_1andaddress_line_2to the address blockcity,state, andzipto the final linecity,state, andzipcan also be combined in one text template:{{city}}, {{state}} {{zip}}
Common product mappings:
product_nameto the main titleskuto a small text linepriceto the price areapriceto a text template such as${{price}}barcodeto the barcode element
The important part is that the design uses spreadsheet fields instead of manually typed values. That way every row can generate a finished label while the layout remains editable with drag-and-drop controls.
| Map Google Sheets columns to compatible label fields |
|---|
 |
Preview the Full Sheet Before Printing
Previewing one label is not enough. Always review the full sheet because layout problems often appear only when many rows are generated.
Look for:
- names wrapping into too many lines
- blank labels from blank sheet rows
- address lines being cut off
- product names colliding with prices or barcodes
- the wrong label layout for the physical paper
If something looks wrong, fix the sheet or mapping first, then export again.
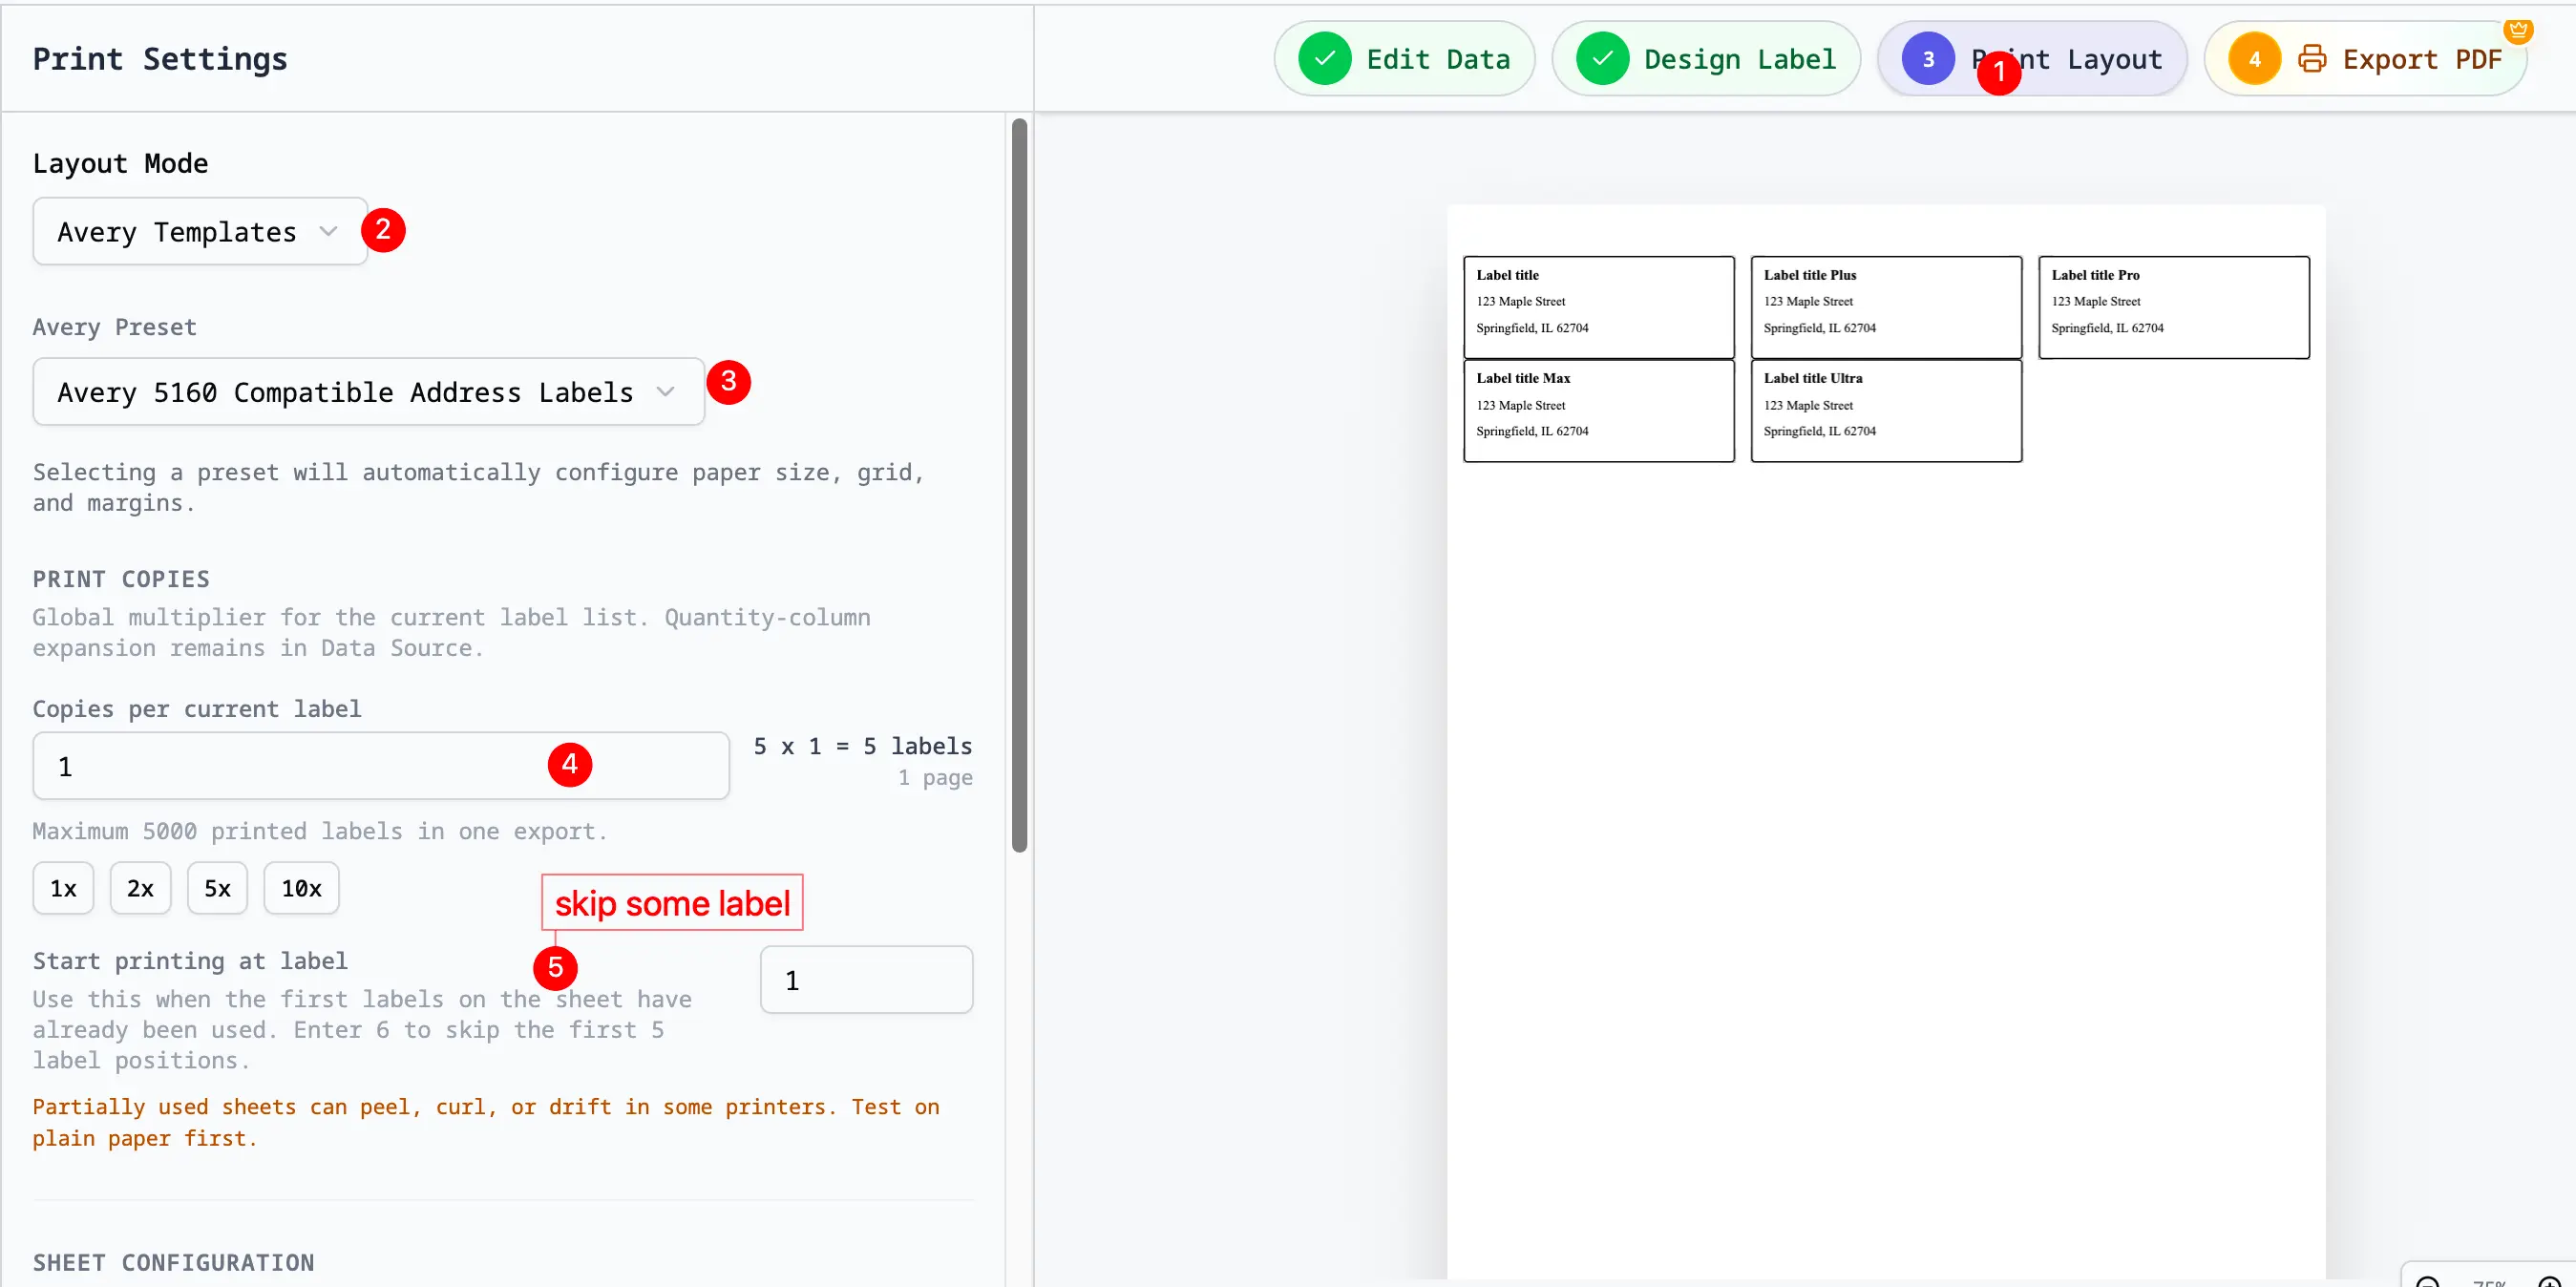
Export and Print the PDF
Once the preview looks right:
- Export the label sheet as a PDF.
- Open the PDF in your normal PDF viewer.
- Print one test page on plain paper.
- Set print scale to
100%orActual Size. - Hold the test print behind the physical label sheet to check alignment.
- Print on label stock only after the test lines up.
Avoid Fit to Page, Shrink to Fit, and browser auto-scaling. Those settings are a common reason printed labels drift away from the stickers.
Common Questions
Can I create Avery®-compatible labels directly from Google Sheets?
Yes. Use a workflow that can read Google Sheets data, map columns to label fields, and export a print-ready PDF.
Do I need Google Docs or Word mail merge?
Not necessarily. Google Docs and Word mail merge can work, but they are less visual. A visual label workflow is usually faster because template selection, drag-and-drop field placement, live preview, full-sheet preview, and PDF export are in one place.
Which template should I choose?
Choose the template that matches the product number on your physical label package. If you use the wrong layout, the PDF may look correct on screen but print out of alignment.